Searing scallops might seem straightforward, but mastering that perfect caramelized crust without overcooking is an art. It’s about patience, timing, and understanding how each tiny crackle and golden edge tells a story of precision. I’ve learned that the key isn’t just in the heat, but in how you handle each step, turning a humble shellfish into something memorable.
This isn’t just a quick cook; it’s a moment of focus. When the pan hits the right temperature and the scallops sit undisturbed, you’ll hear that satisfying sizzle and see the edges turn a rich amber. It’s a dance of timing and texture, where every detail counts—like ensuring they’re dry enough to sear properly or knowing when to flip for that perfect, tender bite.
Focusing on the overlooked art of achieving the perfect sear without overcooking, I want to share how every tiny crackle and caramelized edge tells a story of patience and attention. This isn’t just about cooking scallops; it’s about mastering a moment of transformation in the pan that elevates a simple ingredient into a memorable dish.
The subtle art of searing
- There’s a quiet thrill in hearing that first crackle, like the pan and scallops are finally in sync.
- I still get excited when I flip them perfectly—each time feeling a little more confident about that golden crust.
- Sometimes, I mess up and overcook—it’s a little chaos, but it reminds me to slow down and really watch the heat.
- Sharing this with friends, watching their eyes light up at that caramelized edge—it’s a simple joy I cherish.
- No matter how many times I make them, that moment of placing scallops on the plate feels like a small victory.
The story behind this recipe
- I remember the first time I tried searing scallops in a tiny apartment kitchen, fumbling with a hot pan and a splash of butter. That moment of hearing the crackle, then flipping to that perfect golden edge, felt like magic. It’s a simple dish, but mastering that sear felt like winning a quiet, personal battle.
- Over the years, I’ve learned that the secret isn’t just the heat—it’s patience, dry scallops, and a good non-stick pan. Each successful sear reminds me that cooking is mostly about paying attention, not rushing, and trusting the process. It’s a dish that keeps me honest in my kitchen—every time, a tiny lesson in timing and care.
- heading
- The story behind this recipe
Trivial and Historical Tidbits
- Pan-searing scallops became popular in French cuisine, where precise heat control creates that perfect caramel crust.
- Originally, scallops were considered a luxury ingredient, often served at royal tables in Europe during the Renaissance.
- The technique of searing seafood dates back centuries, with fishmongers in coastal towns perfecting the art for centuries before it hit home kitchens.
Key ingredients at a glance
- Dried scallops: I always pat them dry with paper towels to avoid steaming, which leads to a glorious caramel crust and that satisfying crackle.
- Unsalted butter: I prefer real butter for that rich, nutty aroma during searing. If you want dairy-free, a splash of avocado oil gives a good sear without the milkiness.
- Salt: I season just before searing to enhance flavor without drawing out too much moisture—sea salt flakes on top after plating add a lovely crunch.
- Pepper: Freshly cracked black pepper adds a subtle heat and aroma—skip it if you want a more delicate flavor, or try white pepper for a milder touch.
- Oil with a high smoke point: I use grapeseed or canola oil to get that quick, even sear without smoking too much—olive oil can be smoky and less ideal at high heat.
- Lemon or citrus: A squeeze right after searing brightens the dish instantly—skip if you prefer a richer, butter-only flavor, but I love that pop of brightness.
- Optional herbs: A sprig of thyme or parsley can be added during the last seconds for aroma—fresh herbs make a noticeable difference in aroma and presentation.
Spotlight on key ingredients
Scallops:
- Dried scallops: I always pat them dry with paper towels to avoid steaming, which leads to a glorious caramel crust and that satisfying crackle.
- Fresh scallops: They cook quicker and have a slightly sweeter, briny aroma—ensure they’re very dry before searing to get that perfect crust.
Oil:
- Butter: I prefer real unsalted butter for that rich, nutty aroma during searing. It melts into a golden, flavorful coating that complements the sweetness of scallops.
- High-smoke-point oil: I use grapeseed or canola oil because they heat quickly without burning, giving that crisp, caramelized exterior without a smoky smell.
Notes for ingredient swaps
- Dried scallops: I always pat them dry with paper towels to avoid steaming, which leads to a glorious caramel crust and that satisfying crackle. If unavailable, fresh scallops work well—just ensure they’re very dry before searing.
- Butter: I prefer real unsalted butter for that rich, nutty aroma during searing. For dairy-free, try avocado oil—it’s neutral and has a high smoke point, though it won’t add the same richness.
- Sea salt: I season just before searing to enhance flavor without drawing out too much moisture. If you want a milder saltiness, use fine sea salt or kosher salt—less intense but still effective.
- Black pepper: Freshly cracked black pepper adds a subtle heat and aroma—skip if you want a more delicate, cleaner flavor or try white pepper for a milder, less visual impact.
- Oil: I use grapeseed or canola oil for a quick, even sear at high heat. Olive oil smokes too much at this temperature, and butter alone can burn—so a high smoke point oil is safest.
- Lemon or citrus: A squeeze right after searing brightens the dish instantly—if you prefer a richer, butter-only flavor, skip the citrus, but I love that pop of brightness.
- Herbs: Fresh thyme or parsley during the last seconds add aroma and visual punch. Dried herbs burn quickly and lose flavor—best added fresh at the end.
Equipment & Tools
- Heavy-bottomed skillet: Ensures even heat distribution for a consistent sear.
- Tongs: Handles flipping and transferring scallops gently.
- Paper towels: Dry scallops thoroughly to achieve the best sear.
- Spatula: Assists in turning delicate scallops without breaking them.
Seared scallops step-by-step
- Equipment & Tools: Use a heavy-bottomed skillet—preferably cast iron or stainless steel—for even heat. Have tongs, a paper towel, and a spatula ready for quick handling and flip.
- Pat the scallops dry with paper towels until no moisture remains. This prevents steaming and promotes a good sear.
- Season generously with sea salt just before cooking. Keep extra salt aside for finishing if desired.
- Heat the skillet over medium-high heat until it’s just starting to shimmer—around 200°C / 390°F. Add a high smoke point oil (grapeseed or canola).
- When the oil shimmers and barely smokes, gently place the scallops in the pan, spaced apart. Do not overcrowd; cook in batches if needed.
- Sear without moving for about 1.5–2 minutes. You’ll notice a golden-brown crust forming and a crackling sound—this is your cue.
- Flip the scallops carefully using tongs or a spatula. Sear the other side for another 1.5–2 minutes. They should be opaque and firm but still tender.
- During the last 30 seconds, add a pat of butter (optional) and a sprig of thyme or parsley for aroma. Baste the scallops with the melted butter if using.
- Remove scallops from pan and let rest briefly on a plate lined with paper towels to absorb excess oil. Rest for 1 minute before plating.
- Finish with a squeeze of lemon or citrus zest for brightness. Serve immediately with your preferred sides.
Let the scallops rest for 1 minute after cooking to allow juices to redistribute. Plate immediately with a squeeze of lemon and a sprinkle of finishing salt or herbs for visual appeal.
How to Know It’s Done
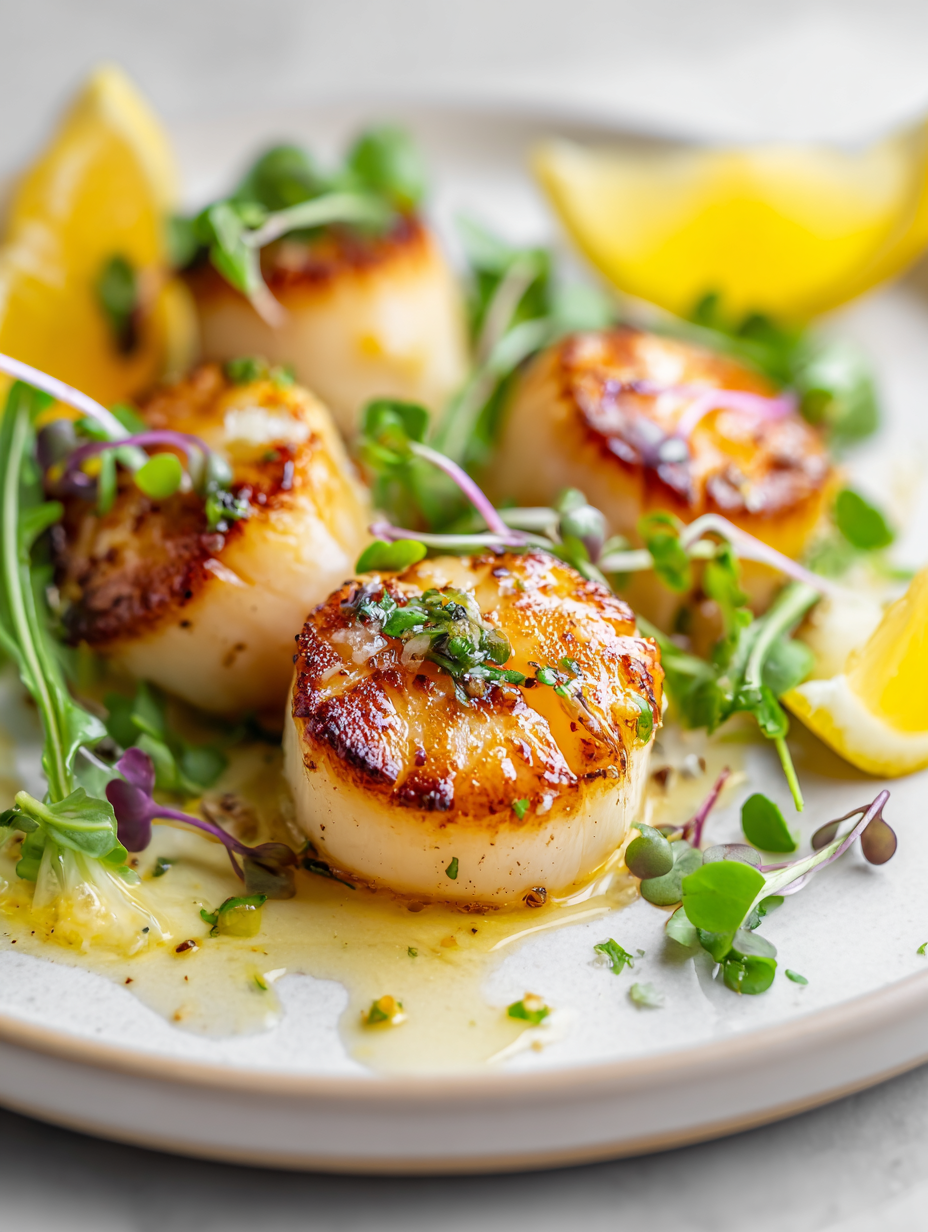
- Color: Edges turn a rich amber, crust is caramelized and not pale.
- Texture: Firm but tender, with a slight jiggle—not rubbery or mushy.
- Appearance: Juices should be minimal, and scallops should be opaque through the center.
Perfect Seared Scallops
Ingredients
Equipment
Method
- Pat the scallops dry thoroughly with paper towels until no moisture remains. This step is crucial for a good sear and a crispy exterior.
- Gently season the scallops with sea salt just before cooking, ensuring even seasoning without drawing out excess moisture.
- Heat your heavy-bottomed skillet over medium-high heat until it just starts shimmering, then add the high smoke point oil. Wait until the oil is hot and slightly smoking—this is your cue for a perfect sear.
- Carefully place the scallops in the hot skillet, spacing them apart to avoid overcrowding. You should hear a satisfying crackle as they hit the pan and begin to sizzle.
- Leave the scallops undisturbed for about 1.5 to 2 minutes, watching as the edges turn a rich amber color and develop a caramelized crust.
- Use tongs or a spatula to gently flip each scallop and sear the other side for another 1.5 to 2 minutes. The scallops should be opaque and firm but still tender inside.
- In the last 30 seconds of cooking, add the butter and herbs if using. Baste the scallops gently with the melted butter to infuse aroma and richness.
- Remove the scallops from the pan and place them on a paper towel-lined plate to absorb any excess oil. Rest for about 1 minute to allow juices to redistribute.
- Squeeze fresh lemon over the scallops for a bright, citrusy finish. Serve immediately with your favorite sides for a stunning presentation.
Pro tips for perfect scallops
- Dry scallops thoroughly: Pat with paper towels until no moisture remains to achieve a crisp, golden crust.
- Preheat your pan: Heat over medium-high until just shimmering, ensuring a hot surface for searing.
- Don’t overcrowd: Space scallops evenly; overcrowding lowers temperature and results in steaming rather than searing.
- Resist the urge to move: Let scallops sit undisturbed for 1.5–2 minutes to develop a caramelized crust before flipping.
- Use high-smoke-point oil: Grapeseed or canola oil prevents burning and provides even heat transfer during searing.
- Finish with butter and herbs: Add a pat of butter and fresh herbs in the last seconds, then baste for aroma and richness.
- Rest briefly after cooking: Allow scallops to sit for 1 minute off heat to reabsorb juices and finish cooking evenly.
Common mistakes and how to fix them
- FORGOT to pat scallops dry? Pat thoroughly with paper towels before searing.
- DUMPED oil into a cold pan? Always heat the oil until shimmering before adding scallops.
- OVER-TORCHED the butter? Add butter at the end on lower heat to prevent burning.
- UNDERESTIMATED cooking time? Sear for 1.5–2 minutes per side for perfect caramelization.
Quick fixes and pantry swaps
- If scallops release too much moisture, pat them dry again to prevent steaming.
- When the oil shimmers but doesn’t crackle, increase heat slightly for better sear.
- Splash a little water in the pan if the butter burns too quickly—reduce heat immediately.
- Patch a stuck scallop by gently loosening with a spatula—avoid force to prevent tearing.
- Shield scallops with a lid for 5 seconds if they start to over-brown quickly, then reduce heat.
Prep, store, and reheat tips
- Pat scallops dry and season just before cooking for optimal sear and flavor.
- Store raw scallops in an airtight container in the coldest part of the fridge; use within 1-2 days for best freshness.
- Cooked scallops can be kept in an airtight container in the fridge for up to 2 days, but they’re best enjoyed immediately for that tender texture.
- Reheat gently in a hot pan for a quick sear to restore some crispness, but expect a slightly softer texture.
- Flavors may mellow slightly after refrigeration; adding a squeeze of lemon or fresh herbs just before serving revives brightness.
Top questions about pan seared scallops
1. How do I pick good scallops?
Look for scallops that are firm, dry, and smell fresh—like the ocean. Avoid anything slimy or with a strong fishy odor.
2. Why do my scallops stick or steam instead of sear?
Pat the scallops very dry with paper towels before searing. Moisture is the enemy of that crispy, caramelized crust.
3. What oil works best for searing scallops?
Use a high-smoke-point oil like grapeseed or canola. Heat it until just shimmering before adding scallops.
4. How long should I sear the scallops?
Cook scallops in a hot pan without moving them for about 1.5 to 2 minutes per side until golden and opaque.
5. When do I know it’s time to flip the scallops?
Flip the scallops when the underside is a deep golden brown and they release easily from the pan.
6. Should I add butter during searing?
Adding butter and herbs during the last 30 seconds adds aroma and richness. Baste the scallops gently for flavor.
7. Do I need to rest scallops after cooking?
Rest scallops on paper towels briefly after cooking to absorb excess oil and finish cooking evenly.
8. How do I flip scallops without breaking them?
Use a thin spatula or tongs to turn scallops gently. Avoid pressing down to prevent losing their delicate shape.
9. How can I tell if scallops are cooked perfectly?
Overcooked scallops turn rubbery. Aim for a firm but tender texture, with a slight jiggle in the center.
10. When should I serve my scallops after cooking?
Serve immediately with a squeeze of lemon or a fresh herb garnish for best flavor and texture.
Searing scallops isn’t just about the technique; it’s about capturing a fleeting moment of perfect caramelization and tender bite. When done right, every bite delivers a smoky, buttery burst that reminds me why I keep coming back to this simple, elegant dish.
In a busy kitchen, those crackles and golden edges feel like a quiet victory. It’s a dish that demands attention but rewards with pure, honest flavor—something I find myself craving more often, especially when seasons shift and fresh seafood beckons.

Hi, I’m Claire Dawson, and I’m the voice behind The Procrastinators Cookbook. Food has always followed me around, even when I was busy putting other things off. Somewhere between long café shifts, half-finished to-do lists, and meals cooked later than planned, I realized that food was the one thing I always came back to.