Making Hell’s Kitchen Mac and Cheese is like stepping into a chaotic kitchen battlefield. There’s shouting, banging pots, and a constant rush to keep everything moving fast. It’s messy, loud, and honestly kind of wild—just like the show, but at home. The secret is embracing the chaos and trusting that the end result will be worth every frantic second.
This dish isn’t about perfection in a quiet, tidy way. It’s about the raw energy of stirring thick cheese sauce while the pasta boils over just a little, and the cheese melts into a gooey, golden mess. When you finally pull it from the oven, the smell of sharp cheese, toasted breadcrumbs, and a hint of smoky paprika hits you right in the gut. It’s pure comfort, made in the middle of the chaos.
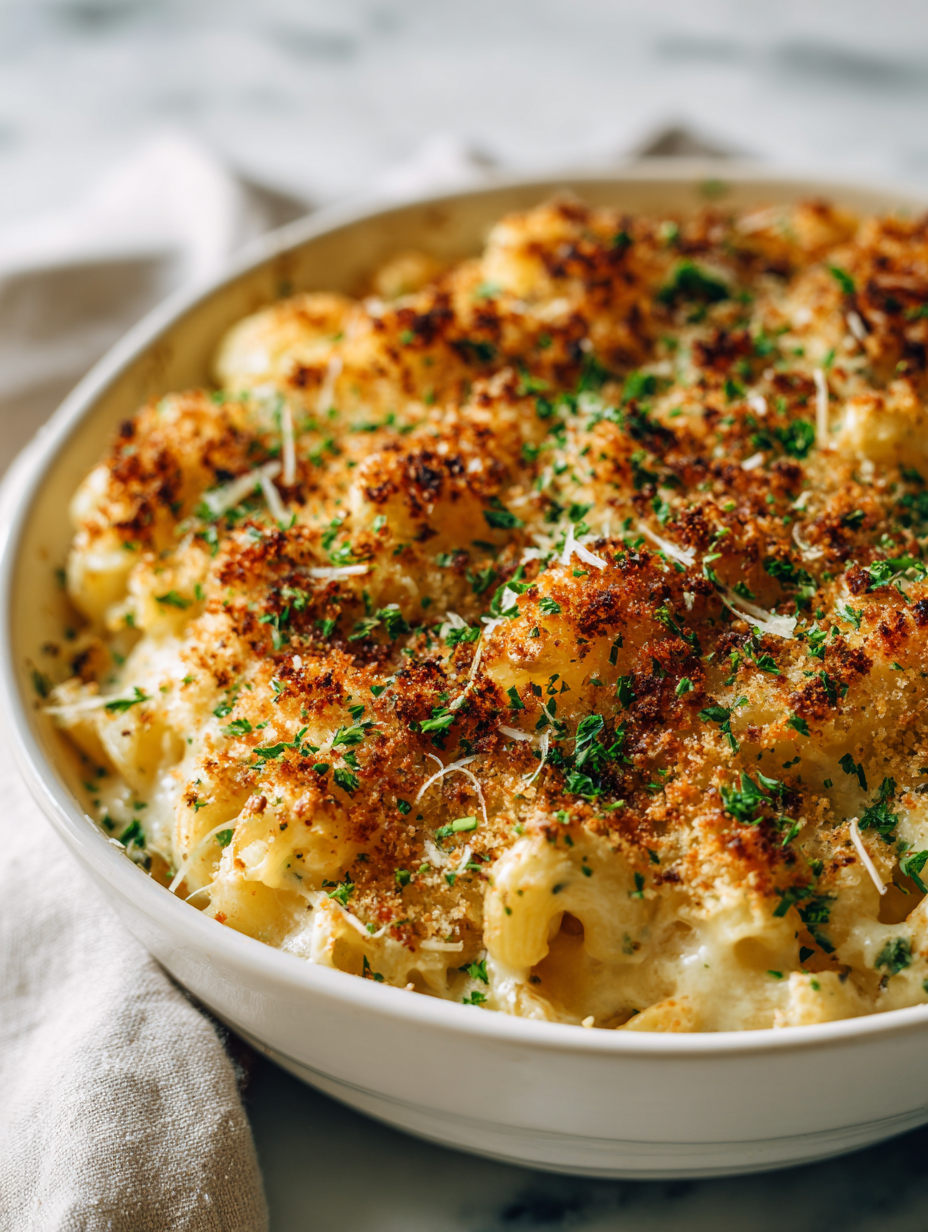
Focusing on the chaotic, high-energy process of making Hell’s Kitchen Mac and Cheese in a busy kitchen, capturing the real messy, loud, and rewarding moments that define true home-cooked comfort amid the chaos.
The chaos behind the perfect cheese
- I love how this dish captures chaos and comfort in every cheesy, crispy bite.
- There’s a wild satisfaction in tossing everything together, knowing it’ll turn out gooey and golden.
- This recipe reminds me of the frantic energy of a busy kitchen, but with a cozy twist.
- Nothing beats the rush of pulling a bubbling, crispy-top pan from the oven after a hectic cook.
- Making this feels like a small rebellion—messy, loud, and totally worth every second.
The chaos behind the perfect cheese
- This recipe came from a night in a chaotic kitchen, where I was trying to keep up with a dozen orders and still wanted that perfect, cheesy crust on top. It’s messy, loud, and full of the kind of energy you find in a real restaurant line—where the rush makes every step feel urgent and alive. I kept thinking, if I can nail that crispy edge amidst the chaos, the rest will fall into place.
- It’s a dish born from the need to make comfort food under pressure, with a crunchy top that’s almost as satisfying as the gooey cheese beneath. Every time I make it, I remember those frantic nights but also the quiet moments when the cheese finally melts perfectly and the crust crisps just right. That’s what keeps me coming back to this recipe—every batch feels like a little victory in the chaos.
- heading: The chaos behind the perfect cheese
Trivia and Origins
- This dish gained fame during intense, high-pressure cooking challenges, where chefs had to deliver comfort food fast.
- The name ‘Hell’s Kitchen’ alludes to the fiery, chaotic environment of Gordon Ramsay’s famous kitchen, where this dish was popularized.
- Originally, it was a way for chefs to showcase their ability to make decadent comfort food under stress, turning chaos into flavor.
Key ingredients and tips
- Cheddar cheese: I love the sharp, punchy flavor it brings—think about using a well-aged cheddar for that extra depth. Swap some Monterey Jack if you want milder, but don’t skip that cheese’s oozy melt.
- Cream: I use heavy cream for richness, but if you want a lighter version, half-and-half works—just watch the sauce stay silky, not greasy. The cream makes it luxuriously thick and velvety.
- Pasta: I prefer elbows because they trap the cheese sauce perfectly, but shells or cavatappi can add a fun twist. Cook until just al dente—overcooked pasta gets mushy in the oven.
- Breadcrumbs: I toast my breadcrumbs with a bit of butter and paprika until golden—gives that crispy, smoky top. For crunch, panko is my go-to, but regular breadcrumbs work in a pinch.
- Spices: A pinch of smoked paprika adds warmth and a subtle smoky kick—don’t skip it, even if it seems small. I add a dash of cayenne for a gentle heat that makes everything pop.
- Butter: I melt it with the breadcrumbs for that nutty, crispy topping—use good quality butter, it makes a noticeable difference. If you’re out, margarine will do but won’t get that toasty depth.
- Mustard: A spoonful of Dijon adds a tangy layer that cuts through the richness. If you don’t have Dijon, a touch of spicy brown mustard can work—just don’t skip it, it brightens the whole dish.
Spotlight on key ingredients
Cheddar cheese:
- I love the sharp, punchy flavor it brings—think about using a well-aged cheddar for that extra depth. Swap some Monterey Jack if you want milder, but don’t skip that cheese’s oozy melt.
- Cream: I use heavy cream for richness, but if you want a lighter version, half-and-half works—just watch the sauce stay silky, not greasy. The cream makes it luxuriously thick and velvety.
Breadcrumbs & Pasta:
- Breadcrumbs: I toast my breadcrumbs with a bit of butter and paprika until golden—gives that crispy, smoky top. For crunch, panko is my go-to, but regular breadcrumbs work in a pinch.
- Pasta: I prefer elbows because they trap the cheese sauce perfectly, but shells or cavatappi can add a fun twist. Cook until just al dente—overcooked pasta gets mushy in the oven.
Notes for ingredient swaps
- Dairy-Free: Swap heavy cream for coconut milk or cashew cream—your sauce will be lighter, with a subtle nutty sweetness.
- Cheese: Use a melting cheese like Monterey Jack or Gruyère if cheddar isn’t available—less sharp, but still gooey.
- Breadcrumbs: Panko adds crunch, but crushed crackers or toasted oats work for a different texture.
- Pasta: Whole wheat or gluten-free pasta can stand in for traditional elbows—cooks slightly differently but still hits that chewy spot.
- Butter: Olive oil or margarine can replace butter—expect a slightly different richness and flavor, but still good.
- Spices: Smoked paprika can be swapped for chipotle powder for more smoky heat, or omit for milder flavor.
- Mustard: Spicy brown or Dijon mustard can be interchanged—just keep in mind the tang and brightness they add.
Equipment & Tools
- Large pot: Boil pasta quickly and efficiently.
- Saucepan: Make and simmer cheese sauce.
- Baking dish: Bake and brown the top.
- Whisk: Smooth out roux and sauce.
- spatula or wooden spoon: Stir ingredients and combine everything.
Step-by-step guide to Hell’s Kitchen Mac and Cheese
- Gather your equipment: a large pot for boiling pasta, a sturdy saucepan for cheese sauce, a baking dish (around 9×13 inch), and a spatula or wooden spoon for stirring. Preheat your oven to 200°C (400°F).
- Bring a large pot of salted water to a rolling boil. Add the pasta and cook until just al dente, about 1 minute less than package instructions—pasta should have a slight bite. Drain and set aside.
- While pasta cooks, melt 4 tablespoons of butter in the saucepan over medium heat (around 160°C / 320°F). Once melted, whisk in 3 tablespoons of all-purpose flour. Cook for 1-2 minutes until the mixture is bubbly and slightly golden, stirring constantly.
- Gradually pour in 2 cups of heavy cream, whisking constantly to prevent lumps. Bring to a gentle simmer (around 85°C / 185°F), and cook until the sauce thickens slightly, about 3-4 minutes. It should coat the back of a spoon.
- Add 2 cups of shredded sharp cheddar cheese in small handfuls, stirring after each addition until melted and smooth. Season with salt, pepper, 1 teaspoon smoked paprika, and a teaspoon Dijon mustard. Taste and adjust seasoning if needed.
- Combine the cooked pasta with the cheese sauce, stirring well to coat every piece. Transfer the mixture into your prepared baking dish, spreading evenly.
- Prepare the topping: in a small bowl, mix 1 cup panko breadcrumbs with 2 tablespoons melted butter, a pinch of smoked paprika, and a dash of salt. Toss to coat thoroughly.
- Sprinkle the toasted breadcrumb mixture evenly over the pasta. Place the dish in the oven and bake for 15-20 minutes, until bubbling around the edges and the topping is golden brown.
- Once out of the oven, let the mac and cheese rest for 5 minutes. This helps the sauce set just a bit and makes it easier to serve without spilling.
- Serve hot, with a crispy topping and a gooey, cheesy center. The top should be crackling slightly and smell rich with toasted butter and sharp cheese.
Let the baked mac and cheese sit for 5 minutes after coming out of the oven. This allows the sauce to thicken slightly and makes serving less messy. Garnish with a sprinkle of fresh herbs if desired, then serve with a side salad or your favorite hot sauce.
How to Know It’s Done
- Cheese sauce is smooth, glossy, and coats the pasta evenly.
- Breadcrumb topping is golden and crispy, not soggy.
- Center of the dish reaches bubbling temperature (~85°C / 185°F).
Hell’s Kitchen Mac and Cheese
Ingredients
Equipment
Method
- Set a large pot of salted water to boil and cook the pasta until just al dente, about 1 minute less than package instructions. Drain and set aside.
- In a saucepan, melt 2 tablespoons of butter over medium heat until it starts to foam and smell nutty.
- Whisk in the flour and cook for 1-2 minutes, stirring constantly, until the mixture bubbles and turns a light golden color.
- Gradually pour in the heavy cream, whisking constantly to prevent lumps, and bring to a gentle simmer until the sauce thickens, about 3-4 minutes.
- Add the shredded cheddar cheese in small handfuls, stirring after each addition until fully melted and smooth. Stir in smoked paprika and Dijon mustard, then season with salt and pepper to taste.
- Combine the cooked pasta with the cheese sauce, stirring well to coat every piece evenly.
- Preheat your oven to 200°C (400°F). Transfer the cheesy pasta mixture into a greased baking dish, spreading it out evenly.
- In a small bowl, toss the panko breadcrumbs with the remaining 2 tablespoons of melted butter, paprika, and a pinch of salt. Spread the toasted crumbs evenly over the pasta.
- Bake in the preheated oven for 15-20 minutes, until bubbling around the edges and the breadcrumb topping is golden brown and crispy.
- Remove from the oven and let sit for 5 minutes to allow the sauce to set. Serve hot, with a crispy topping and a gooey, cheesy center.
Pro tips for perfect mac and cheese
- & bubbly: Ensure your cheese sauce is just bubbling at the edges for that perfect gooey texture.
- Golden crunch: Toast breadcrumbs with butter and paprika until deeply golden for maximum flavor and crunch.
- Stir constantly: Keep cheese melting smoothly by whisking in small amounts and off-heat if necessary.
- Layer flavors: Add a pinch of smoked paprika or cayenne early to build depth and smoky warmth.
- Taste as you go: Adjust seasoning and cheese levels before baking—cheesy richness should be balanced and vibrant.
- Use sharp cheese: The sharper the cheese, the better the flavor contrast—don’t skimp on bold varieties.
- Rest briefly: Let the baked dish sit for 5 minutes after coming out of the oven—this helps set the sauce and prevents spills.
Common mistakes and how to fix them
- FORGOT to stir cheese into the sauce → Stir constantly for smooth melt.
- DUMPED cheese directly into hot sauce → Add cheese gradually, off heat if needed.
- OVER-TORCHED breadcrumb topping → Remove early if golden-brown before time, cover loosely to prevent burning.
- MISSED resting time after baking → Rest 5 minutes to set sauce and prevent spills.
Fast fixes for kitchen mishaps
- If sauce is too thick, splash in warm milk and stir gently.
- When breadcrumbs burn quickly, reduce oven heat or cover loosely with foil.
- Splash cold water on bubbling cheese sauce to stop it from over-thickening.
- Patch a runny sauce with a teaspoon of cornstarch slurry—stir until smooth and glossy.
- Shield cheese from scorching by moving the dish to a lower oven rack mid-bake.
Prep, store, and reheat tips
- You can prep the cheese sauce and cook the pasta a day ahead. Store separately in airtight containers in the fridge. The sauce will thicken slightly overnight, so plan to reheat and stir in a splash of cream to loosen it up.
- Assemble the dish in the baking dish a few hours before baking. Cover tightly with plastic wrap. The flavors meld overnight, developing a richer, more cohesive cheesy punch.
- Shelf life is about 2-3 days in the fridge. After that, the cheese can start to break down, and the sauce might separate slightly. Reheat thoroughly, checking that it’s hot and bubbly.
- To reheat, microwave in bursts, stirring often, until steaming and hot—about 2-3 minutes. Alternatively, reheat in a low oven at 180°C (350°F) until warmed through, about 15-20 minutes. The top should shimmer and crackle when ready.
Top questions about Hell’s Kitchen Mac and Cheese
1. Can I use different cheese types?
Use a sharp cheddar for a bold flavor and gooey melt. Mild cheeses like Monterey Jack will soften but lack punch.
2. How do I know when the pasta is done?
Cook the pasta until just al dente, about 1 minute less than package suggests. Overcooked pasta gets mushy after baking.
3. What’s the perfect baking time?
Bake at 200°C (400°F) for 15-20 minutes until bubbling and the top is golden brown. Keep an eye on it to avoid burning the breadcrumbs.
4. How do I get that crispy topping?
Use fresh breadcrumbs toasted with butter and paprika until golden for maximum crunch and smoky flavor.
5. My cheese sauce is too thick. How do I fix it?
If your cheese sauce is too thick, stir in a little warm milk or cream until smooth and creamy again.
6. Can I make this ahead of time?
You can prepare the cheese sauce and cook the pasta a day ahead. Store separately and assemble just before baking.
7. What if my cheese sauce is grainy?
Ensure the cheese is added gradually off the heat if the sauce starts to break or become grainy. Stir constantly for a smooth melt.
8. What tools are best for this recipe?
Use a large, heavy-bottomed saucepan to prevent scorching and for easy stirring. A good whisk helps smooth out roux and sauce.
9. Why should I rest the mac and cheese?
Rest the baked dish for 5 minutes after removing from the oven. It helps the sauce set and makes serving neater.
10. How do I enhance the flavor?
Add a pinch of smoked paprika or cayenne early to build warmth and depth. Season to taste before baking for maximum flavor.
In the chaos of making this dish, you start to see how messy energy turns into something comforting and real. The sizzling, the bubbling cheese, the crispy topping—each step feels like a small victory amid the noise.
This mac and cheese isn’t just about the final bite; it’s about embracing the mess, the heat, and the imperfect perfection of a dish born from high-energy moments. Every time I make it, I remember why I love this wild, loud process—because the best food often comes from the chaos.

Hi, I’m Claire Dawson, and I’m the voice behind The Procrastinators Cookbook. Food has always followed me around, even when I was busy putting other things off. Somewhere between long café shifts, half-finished to-do lists, and meals cooked later than planned, I realized that food was the one thing I always came back to.