Mini quiches might seem like fancy brunch fare, but honestly, they’re one of the most practical snacks around. You can make a batch on a lazy Sunday and have breakfast or lunch sorted for days. Plus, customizing fillings means everyone gets what they want—cheese, veggies, ham—whatever you’re craving.
What I love most is how forgiving and adaptable they are. No need for perfect pastry edges or fancy techniques. Just mix, fill, bake, and you’re set. They’re great for mornings when everything feels rushed but you still want something satisfying, or for taking along in a lunchbox that’s more than just a sandwich.
Focusing on how mini quiches can serve as a versatile, portable meal for busy mornings or quick lunches, emphasizing their adaptability and the personal touch in choosing fillings.
A Tiny Feast for Any Time
- Making mini quiches feels like a small act of kitchen rebellion—no fuss, no stress, just simple joy.
- I remember the first time I added caramelized onions—every bite became a moment of sweet, smoky comfort.
- Baking these always reminds me of lazy weekend mornings, filling the house with warm, cheesy smells.
- There’s a quiet pride in pulling out a tray of perfectly puffed, golden mini quiches for friends—like a tiny victory.
- Sometimes, I toss in leftover bits from the fridge just to see how wild I can get—surprisingly, it’s always delicious.
The story behind this recipe
- Making mini quiches always takes me back to childhood brunches at my grandma’s house. She’d whip up a tray while I sneaked a peek at the bubbling cheese and crispy edges. Those mornings had a quiet chaos—kids running around, coffee brewing, and the smell of baked eggs filling the air.
- The inspiration for this recipe came from those lazy weekend mornings but also from a desire to make something portable and forgiving. I love how you can customize fillings to match whatever’s in the fridge—leftover veggies, bits of ham, or just cheese and herbs. It’s a little project that lifts the whole day with its warm, cheesy promise.
- heading: ‘The story behind this recipe’
Historical and Cultural Tidbits
- Mini quiches have roots in French cuisine, dating back to the early 20th century, offering a portable, elegant snack.
- They gained popularity in the US during the 1950s as convenient party finger foods, often served at brunches and luncheons.
- Historically, mini quiches were a way to use leftover pastry scraps and bits of cheese, turning them into a refined dish.
- The concept of individual-sized savory pies can be traced to medieval Europe, where small pastries were common among the aristocracy.
Ingredient breakdown: key components
- Eggs: I rely on fresh eggs for a rich, custardy filling. You can use a splash of milk or cream if you like it extra silky.
- Cheese: I love a sharp cheddar for that tangy kick, but if you prefer milder flavors, mozzarella melts beautifully and adds gooeyness.
- Vegetables: Bell peppers and spinach bring color and freshness. Sauté them first to boost their flavor and reduce moisture.
- Meat fillings: Ham or cooked bacon bits are my go-tos. For a leaner option, turkey ham works well and keeps things lighter.
- Pastry: Store-bought pie dough is my quick fix, but if you have time, making your own flaky crust makes a real difference—crisp and buttery.
- Herbs & Spices: Fresh thyme or chives add brightness. For a smoky note, a pinch of smoked paprika works magic on the filling.
- Seasonings: Salt and pepper are staples, but a dash of nutmeg in the custard adds a subtle warming depth.
Spotlight on key ingredients
Eggs:
- I rely on fresh eggs for a rich, custardy filling. You can use a splash of milk or cream if you like it extra silky.
- Cheese: I love a sharp cheddar for that tangy kick, but if you prefer milder flavors, mozzarella melts beautifully and adds gooeyness.
- Vegetables: Bell peppers and spinach bring color and freshness. Sauté them first to boost their flavor and reduce moisture.
Cheese & Vegetables:
- Cheese: Sharp cheddar or mozzarella—each adds a different burst of flavor and texture. Freshly grated melts better and feels more vibrant.
- Vegetables: Spinach wilts quickly and releases moisture, so sauté before filling. Bell peppers bring a sweet, smoky crunch that’s worth the prep.
Notes for ingredient swaps
- Dairy-Free: Swap regular milk or cream for coconut milk or cashew cream for a rich, dairy-free custard. Keep in mind, the flavor will have a subtle coconut note.
- Cheese: Use a plant-based cheese or nutritional yeast to mimic that cheesy tang. The texture won’t be as gooey but still flavorful.
- Vegetables: Frozen spinach or roasted zucchini work well if fresh isn’t available. Sauté to remove excess moisture and boost flavor.
- Meat: Turkey bacon or cooked chicken slices can replace ham or bacon. They’re leaner but still satisfy that savory bite.
- Pastry: Gluten-free pie crust or even mashed potatoes pressed into muffin tins can create a different but tasty shell. Expect a different texture, softer or crispier.
- Herbs & Spices: Dried herbs like oregano or basil are fine substitutes for fresh thyme or chives. Use about half as much, as dried concentrates flavor.
- Seasonings: A splash of soy sauce or miso can add depth if you’re missing salt and pepper. Adjust to taste and be mindful of added salt.
Equipment & Tools
- Muffin tin: Shape and hold the pastry shells during baking.
- Mixing bowls: Whisk eggs and mix fillings easily.
- Whisk: Combine custard ingredients smoothly.
- Rolling pin: Roll out pastry dough evenly.
- Pastry cutter or glass: Cut out pastry circles.
Step-by-step guide to mini quiches
- Gather your equipment: muffin tin (for shape), mixing bowls, whisk, rolling pin, and a pastry cutter or glass.
- Preheat your oven to 190°C (375°F). Lightly grease the muffin tin or line with paper liners.
- Roll out your pastry dough on a lightly floured surface to about 3mm thick. Use a round cutter or glass to cut out circles slightly larger than your muffin cups.
- Press each pastry circle into the muffin cups, easing into the corners. Chill the lined tin for 10 minutes to firm up the pastry.
- While the pastry chills, whisk together 4 large eggs, 150ml (⅔ cup) cream or milk, salt, pepper, and a pinch of nutmeg if using. Set aside.
- Prepare your fillings: sauté vegetables like spinach or peppers until just tender, or crumble cooked bacon or ham. Let cool slightly.
- Add fillings to each pastry shell, about 1-2 tablespoons each, then pour the egg mixture over the fillings until nearly full.
- Bake in the preheated oven for 20-25 minutes. The mini quiches are done when the edges are golden and the filling is set but slightly jiggly in the center.
- Remove from oven and let cool in the tin for 5 minutes. Use a small spatula to gently lift them out.
- Finish by placing on a wire rack for a few minutes. Serve warm or at room temperature. These are great with a simple green salad.
Let the mini quiches rest for 5 minutes on a wire rack to set. Serve warm or at room temperature, garnished with herbs if desired.
How to Know It’s Done
- Pastry edges are golden and crisp, filling is set and slightly puffed in the center.
- Probe the center with a toothpick or skewer—comes out clean, filling no longer runny.
- Mini quiches are firm but tender, with a slight jiggle in the middle when gently shaken.
Mini Quiches
Ingredients
Equipment
Method
- Unroll the store-bought pie dough on a lightly floured surface and use a pastry cutter or glass to cut out circles slightly larger than your muffin cups. Press each circle into the muffin tin, easing into the corners. Chill the lined tin in the fridge for 10 minutes to help prevent shrinking.
- Preheat your oven to 190°C (375°F). While it heats, sauté diced bell peppers and chopped spinach in a little oil until just tender and moisture has evaporated. Let them cool slightly before filling.
- In a mixing bowl, whisk together the eggs, cream or milk, chopped thyme, salt, and pepper until smooth and slightly frothy. This creates a silky custard base for the quiches.
- Add the shredded cheese, sautéed vegetables, and diced ham into the egg mixture. Gently fold everything together to distribute fillings evenly.
- Spoon 1-2 tablespoons of the filling mixture into each pastry-lined muffin cup, filling about 2/3 full to leave room for puffing.
- Pour the custard mixture over the fillings in each cup until nearly full, ensuring the ingredients are submerged and the filling is level.
- Bake in the preheated oven for 20-25 minutes, or until the edges are golden brown and the filling is puffed and set in the center. The tops may crack slightly, which is normal.
- Remove the mini quiches from the oven and let them cool in the tin for about 5 minutes. This helps the filling set further and makes them easier to handle.
- Gently lift each quiche out of the muffin tin with a small spatula and transfer to a wire rack to cool slightly before serving.
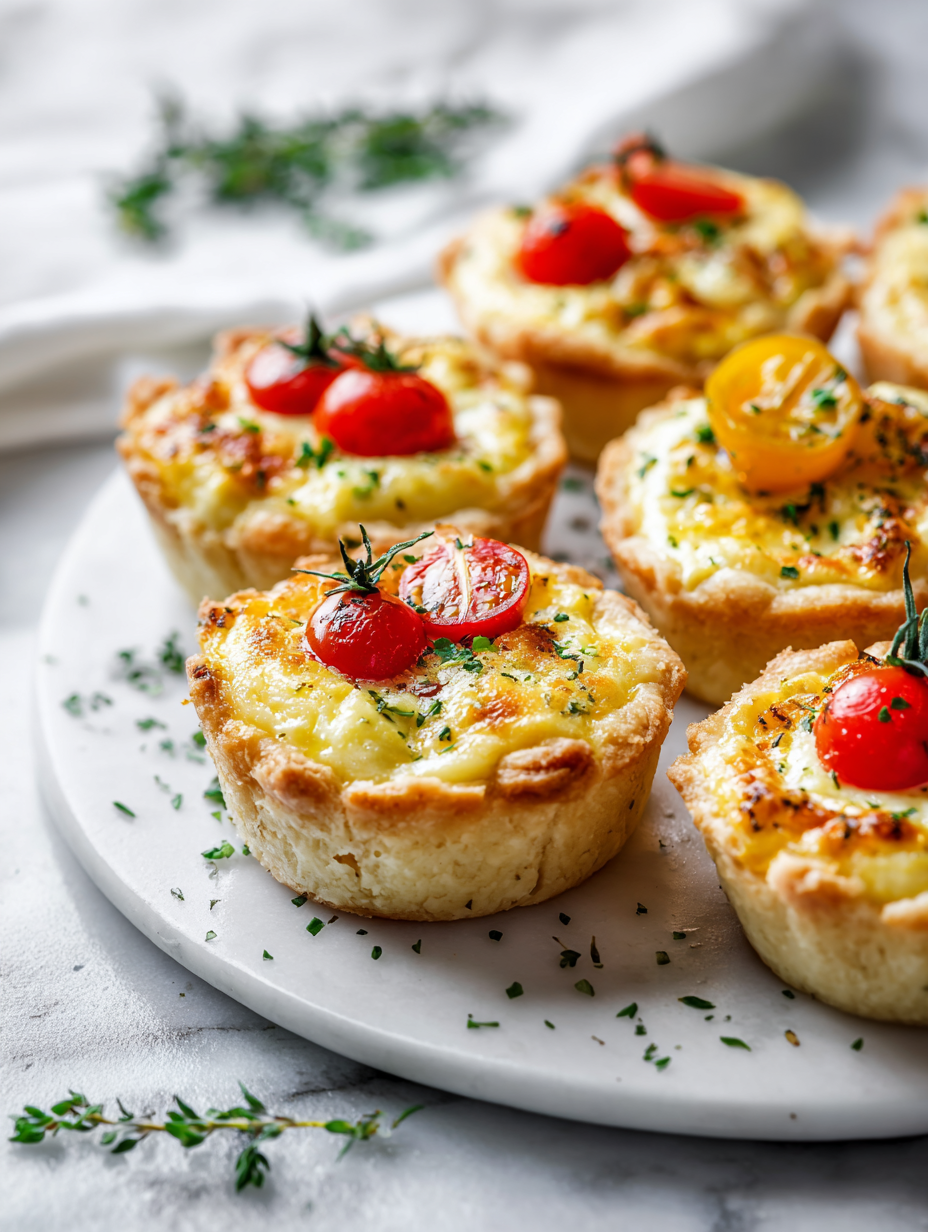
- Serve the mini quiches warm or at room temperature, garnished with extra thyme or herbs if desired. Enjoy their tender, custardy interior with a crisp, flaky crust.
Pro Tips for Perfect Mini Quiches
- Bolded mini-head: Use very cold butter when making pastry to create flaky layers that shatter on the tongue.
- Bolded mini-head: Chill the pastry dough for at least 30 minutes; it’s the secret to preventing shrinkage and cracking.
- Bolded mini-head: When filling the tart shells, avoid overfilling to prevent spilling and uneven cooking.
- Bolded mini-head: Bake until the edges are golden and crisp, but the center still jiggles slightly for a tender custard.
- Bolded mini-head: Use a toothpick inserted into the center—if it comes out clean, the quiche is ready to remove from oven.
- Bolded mini-head: Rest the mini quiches for 5 minutes before serving to let the filling set and make slicing easier.
- Bolded mini-head: For a browned top, broil for 1-2 minutes at the end, watching carefully to prevent burning.
Common mistakes and how to fix them
- FORGOT to check oven temperature → Use an oven thermometer for accuracy.
- DUMPED in cold filling → Let fillings cool slightly to prevent soggy pastry.
- OVER-TORCHED edges → Cover edges with foil if they brown too quickly.
- UNDER-BAKED crust → Bake a few minutes longer if crust is pale and soft.
Quick fixes and pantry swaps
- When filling spills over, splash some cold water on the crust to cool and harden it quickly.
- If the quiches are too soft, patch with a sprinkle of grated cheese and broil until bubbly and golden.
- Splash a little lemon juice over dull fillings to brighten flavors instantly.
- DUMPED in too much liquid? Rest the baked quiches briefly to absorb excess moisture.
- When pastry shrinks, shield edges with foil or a strip of parchment during baking to prevent over-browning.
Prep, store, and reheat tips
- Prepare the pastry shells and blind bake them up to 2 days in advance; store in an airtight container at room temperature for a crisp crust.
- Assemble and fill the mini quiches a day ahead; keep covered in the fridge. The flavors meld overnight, making each bite more harmonious.
- Refrigerate leftover mini quiches for up to 3 days. Reheat in the oven at 160°C (320°F) until warmed through, about 10 minutes, until the cheese slightly bubbles.
- For freezing, wrap individually and store in an airtight container for up to 1 month. Reheat straight from frozen, adding 5-7 minutes.
- Reheated mini quiches develop a slightly softer crust but retain their creamy filling, with a comforting warmth and cheesy aroma re-emerging.
Top questions about mini quiches
1. Can I use pre-made pastry instead of homemade?
Use fresh eggs for a rich, custardy filling that sets well. If you want it extra silky, add a splash of cream.
2. How do I prevent the pastry from getting soggy?
Yes, store-bought pie crust works fine. Just keep an eye on baking times as it might cook faster.
3. Can I prepare these ahead of time?
Make sure to pre-bake the pastry shells slightly before adding fillings. This helps keep them crisp after baking.
4. How long do they last in the fridge?
Absolutely. You can fill and bake them the day before, then reheat in the oven at 160°C (320°F) for about 10 minutes.
5. Can I freeze mini quiches?
Refrigerate leftovers for up to 3 days. Reheat until warm and cheese slightly bubbly for best texture.
6. What fillings can I customize?
Yes, wrap individually and freeze for up to a month. Reheat directly from frozen, adding a few extra minutes.
7. Can I make these vegan?
Use whatever you have—cheese, cooked meats, veggies. Just sauté moisture-rich vegetables first to avoid sogginess.
8. How do I know when they’re done?
Yes, substitute eggs with silken tofu blended with a bit of nutritional yeast, and use plant-based cheese.
9. Why do my quiches crack on top?
Look for golden edges, a slightly jiggly center, and when a toothpick inserted comes out clean.
10. Can I add herbs or spices?
Cracking can happen if overbaked or if the filling cools too quickly. Cover edges with foil if browning too fast.
Making mini quiches might seem like a small kitchen task, but it’s a quiet act of creativity that pays off in busy mornings or unexpected guests. Each bite carries the warmth of cheese and the richness of eggs, wrapped in a flaky crust that’s just crispy enough.
They’re more than just snacks—they’re a way to bring a little homemade comfort into everyday chaos, with a personal touch in every filling. No matter how simple, they turn ordinary ingredients into something that feels special, even on the busiest days.

Hi, I’m Claire Dawson, and I’m the voice behind The Procrastinators Cookbook. Food has always followed me around, even when I was busy putting other things off. Somewhere between long café shifts, half-finished to-do lists, and meals cooked later than planned, I realized that food was the one thing I always came back to.