Bacon-wrapped dates are a little revelation for anyone who loves a good mix of sweet and savory. They’re simple, yes, but packed with a punch of flavor that’s both nostalgic and party-ready. I stumbled upon this combo years ago at a tapas bar, and it’s been a keeper ever since.
Why I keep making these little bites
They’re quick to assemble, endlessly customizable, and always disappear fast. The combination of sweet, salty, and smoky hits a familiar comfort zone while still feeling special. They remind me of gatherings, spontaneous bites, and those moments when everyone can’t stop reaching for just one more.
Inside the ingredients—what makes this magic happen
- Dates: Sweet, chewy, and caramel-like—these are the foundation of the flavor.
- Bacon: Salty, smoky, and crispy—wraps everything in a savory blanket.
- Cheese (optional): Creamy, melts inside, adding richness—think goat or cream cheese.
- Nuts (optional): Crunchy almonds or pistachios—add texture and nutty flavor.
- Honey or maple syrup (optional): A drizzle adds a shiny, sweet glaze—balancing the smoky salt.
- Herbs or spices (optional): Fresh thyme or black pepper—bring a hint of freshness.
Tools of the trade for perfect bacon-wrapped dates
- Baking sheet: To hold the dates and allow even heat distribution.
- Parchment paper: Prevents sticking and makes cleanup easier.
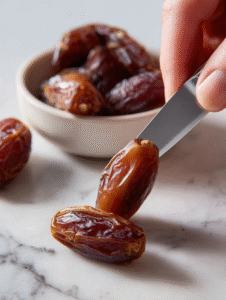
- Sharp paring knife: To pit the dates cleanly without tearing.
- Toothpicks: To secure the bacon around the dates.
- Oven thermometer (optional): To ensure accurate oven temperature.
Step-by-step guide to bacon-wrapped dates
Step 1: Preheat your oven to 200°C (390°F).
Step 2: Pit the dates carefully, creating a small pocket if needed.
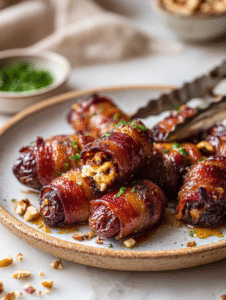
Step 3: Stuff each date with a small piece of cheese or almond for extra richness.
Step 4: Wrap each stuffed date with a slice of bacon, securing with a toothpick.
Step 5: Arrange the bacon-wrapped dates on a baking sheet lined with parchment paper.
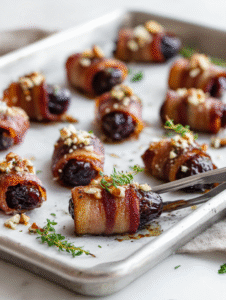
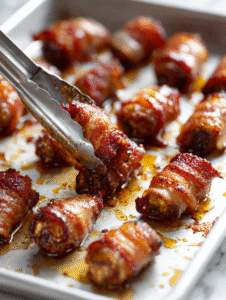
Step 6: Bake for 20-25 minutes, turning halfway, until bacon is crispy and golden.
Step 7: Remove from oven, let rest for 5 minutes—bacon continues to crisp as it cools.
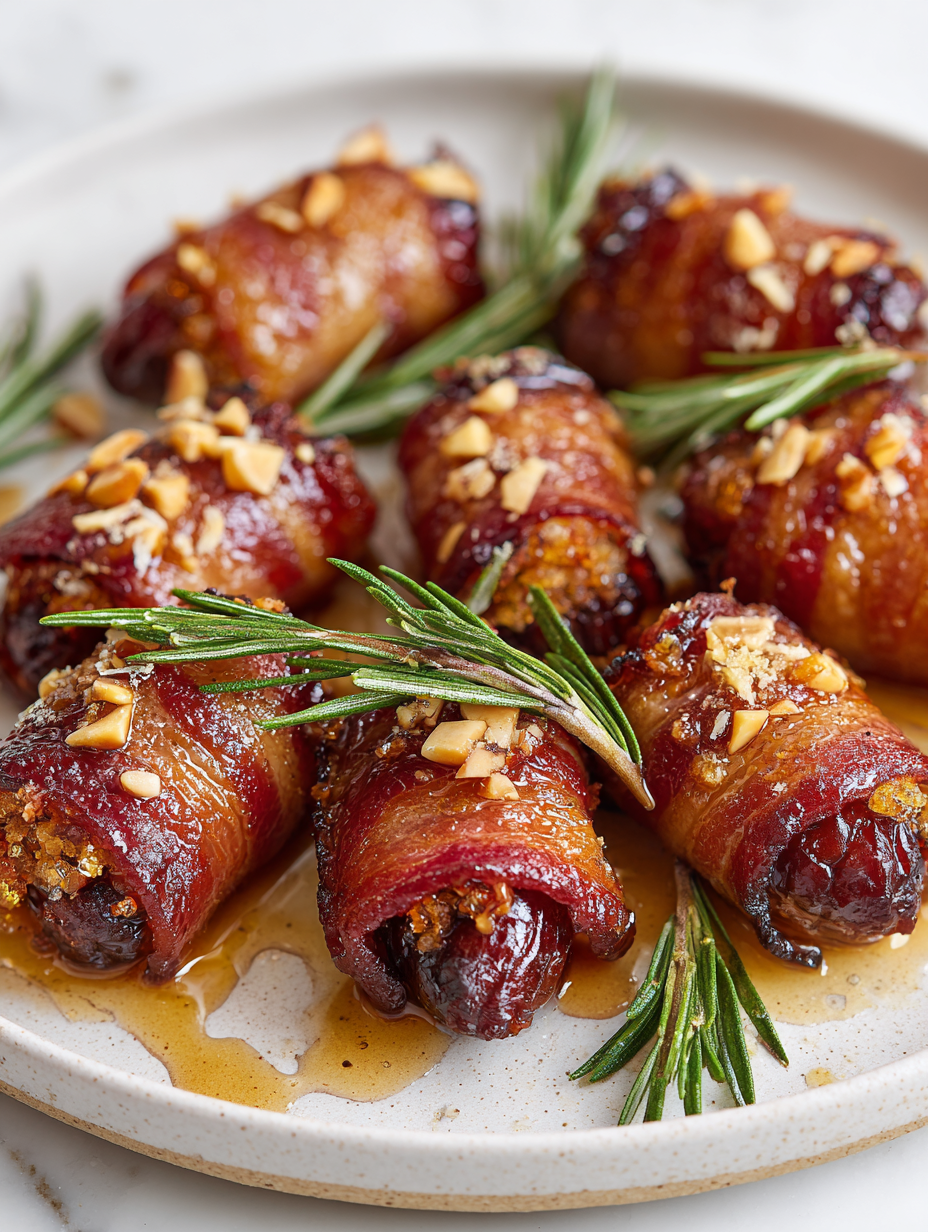
Step 8: Serve warm, perhaps with a drizzle of honey or a sprinkle of chopped herbs.
Bacon-Wrapped Dates
Ingredients
Equipment
Method
- Preheat your oven to 200°C (390°F) and line a baking sheet with parchment paper.

- Carefully pit each date with a small paring knife, creating a pocket if needed.
- Stuff each date with a small piece of cheese or a few chopped nuts for extra richness and crunch.
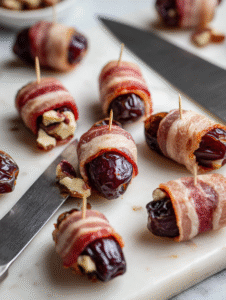
- Cut each bacon slice in half crosswise, then wrap each stuffed date tightly with a bacon piece, securing it with a toothpick.
- Arrange the bacon-wrapped dates on the prepared baking sheet, spacing them evenly.
- Bake for 20-25 minutes, turning once halfway through, until the bacon is crispy and golden brown.
- Remove from the oven and let rest for 5 minutes; the bacon will continue to crisp up slightly as it cools.
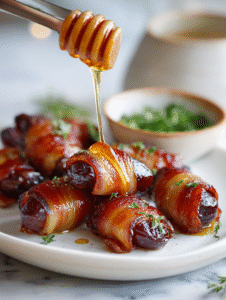
- If desired, drizzle with honey or sprinkle with chopped herbs for added flavor and presentation.
Notes
Cooking checkpoints and tips for perfection
- The bacon should be crisp and browned, not burnt. Keep an eye on the oven after 15 minutes.
- Dates should be soft but not falling apart—test by gently squeezing.
- Cheese inside should be melted and oozy, not dry or hardened.
- Ensure bacon pieces are snug but not overly tight—this helps even crisping.
Common pitfalls and how to fix them
- Bacon unwinds during baking.? Use toothpicks to keep bacon secure, so it doesn’t unravel.
- Bacon turns out limp or undercooked.? Bake at 200°C (390°F) for crispy bacon.
- Filling leaks during baking.? Don’t overstuff the dates, or filling spills out.
- Uneven crisping on all sides.? Flip the bacon-wrapped dates halfway.
These bites are more than just appetizers; they’re little bundles of sweet, smoky, and salty magic. The balance of textures—chewy, crispy, oozy—keeps you coming back for more. Feel free to experiment with different cheeses or nuts to match your mood or party theme. They’re surprisingly easy to make, and the aroma alone will draw everyone to the table.

Hi, I’m Claire Dawson, and I’m the voice behind The Procrastinators Cookbook. Food has always followed me around, even when I was busy putting other things off. Somewhere between long café shifts, half-finished to-do lists, and meals cooked later than planned, I realized that food was the one thing I always came back to.