These baked cheese balls started as a lazy snack experiment that somehow turned into a craving I couldn’t shake. There’s something about that crispy, cheesy exterior—almost like a crunchy blanket wrapping soft, warm cheese—that feels like comfort in every bite. Getting that perfect crunch without frying took some trial and error, but now I swear, the oven does all the work and the results are worth it.
What I love most is how forgiving this recipe is—no deep fryer needed, just a good oven and a watchful eye. It’s the kind of snack that feels fancy enough for guests but simple enough for a quick treat on a busy weeknight. The secret, I’ve found, is in the oven technique—getting the cheese balls to turn golden and crispy on the outside while staying gooey inside, that’s the real magic.
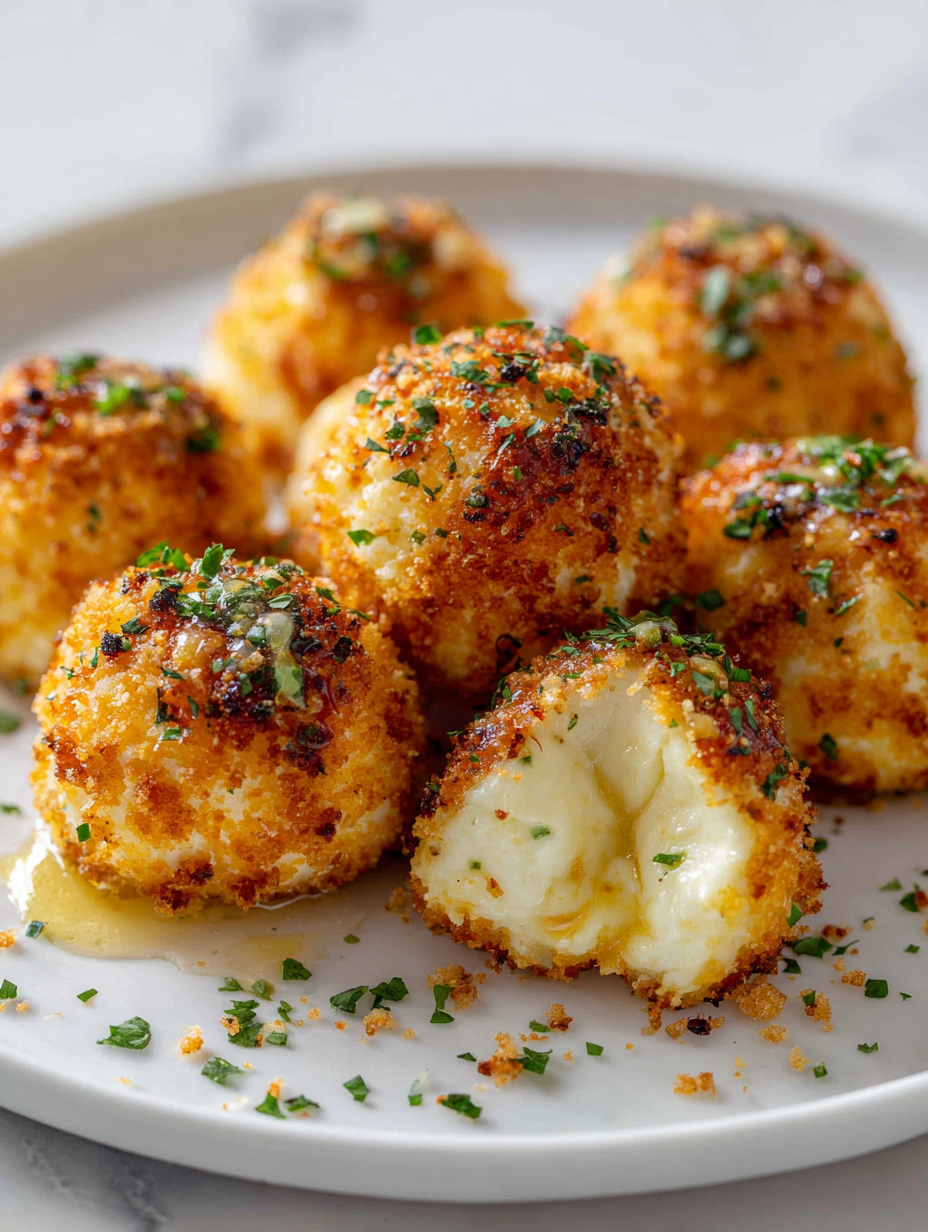
Focusing on how the crispy, cheesy exterior of these baked cheese balls can be perfected with just the right oven technique, turning a simple snack into a satisfyingly crunchy treat that’s perfect for sharing.
The story behind this recipe
- This recipe was born from a late-night kitchen mess, where I was trying to make something cheesy and crispy without frying. The first batch was a total disaster—cheese oozed out, and they were soggy. But I loved the idea of a crunchy outside with melty cheese inside, so I kept tinkering until I got it just right.
- Over time, I realized that oven heat and the right cheese combo were key. Watching these balls turn a perfect golden hue becomes oddly satisfying, especially knowing they’re crispy without any oil splash. It’s become my go-to snack for lazy weekends and unexpected guests, a little bit of comfort with every bite.
- heading: The story behind this recipe
Key ingredients and tips
- Cheddar cheese: I love the sharp, tangy bite it adds, but a milder mozzarella makes for a creamier, more gooey ball—try swapping to suit your mood.
- Breadcrumbs: I use panko for extra crunch, but regular fine breadcrumbs work just fine if you prefer a softer outside—just watch the color.
- Egg: It binds everything together and helps the coating stick; if you’re out, a splash of milk will do, but it won’t hold quite as well.
- Parmesan: Adds umami and a salty kick, especially when freshly grated—skip it if you want a milder, more neutral flavor.
- Herbs & spices: I love a pinch of paprika or cayenne for a smoky heat, but dried oregano or thyme also bring a nice herbal note—experiment to find your favorite.
- Oil spray: Just enough to help the breadcrumbs crisp up; I prefer a light mist, but a quick brush works if you don’t have spray.
- Optional extras: A touch of hot sauce or chopped jalapeños inside can add a surprising kick—be gentle if you’re sharing with kids or sensitive eaters.
Spotlight on key ingredients
Cheddar cheese:
- I love the sharp, tangy bite it adds, but a milder mozzarella makes for a creamier, more gooey ball—try swapping to suit your mood.
- Breadcrumbs: I use panko for extra crunch, but regular fine breadcrumbs work just fine if you prefer a softer outside—just watch the color.
- Egg: It binds everything together and helps the coating stick; if you’re out, a splash of milk will do, but it won’t hold quite as well.
Breadcrumbs:
- I use panko for extra crunch, but regular fine breadcrumbs work just fine if you prefer a softer outside—just watch the color.
- Egg: It binds everything together and helps the coating stick; if you’re out, a splash of milk will do, but it won’t hold quite as well.
Notes for ingredient swaps
- Dairy-Free: Swap cheese for a plant-based mozzarella or cashew cheese. Expect a milder, less gooey texture but still satisfying.
- Gluten-Free: Use crushed gluten-free rice crackers or almond flour instead of breadcrumbs. Keep in mind, the crunch may be slightly different.
- Vegan: Replace cheese with shredded vegan cheese and use a flaxseed or chia seed egg substitute. The flavor will be milder and less rich.
- Low-Sodium: Opt for low-sodium cheese and skip added salt in the breadcrumb mixture. The overall saltiness will be gentler but still flavorful.
- Spicy Kick: Add chopped jalapeños or a dash of hot sauce to the mixture for extra heat. Be cautious if serving kids or sensitive palates.
- Herb Variations: Swap herbs like oregano or thyme with fresh basil or cilantro for a different aromatic profile.
- Oil Spray: Use a light brushing of melted butter or olive oil if you prefer a different flavor or don’t have spray on hand.
Equipment & Tools
- Baking sheet: Provides a flat surface for baking; ensures even heat distribution.
- Parchment paper or silicone mat: Prevents sticking and makes cleanup easier.
- Mixing bowls: Hold the ingredients for easy combining.
- Small scoop or spoon: Portions out uniform cheese balls.
- Cooking spray or pastry brush: Helps achieve a crispy, golden exterior.
Guide to Perfect Baked Cheese Balls
- Preheat your oven to 200°C (390°F). Line a baking sheet with parchment paper or a silicone mat. Gather your mixing bowls, a small scoop or spoon, and a baking brush.
- In a bowl, combine shredded cheese, breadcrumbs, a beaten egg, grated Parmesan, and your chosen herbs and spices. Mix until well combined. If the mixture feels too sticky, add a bit more breadcrumbs.
- Using a small scoop or spoon, portion out the cheese mixture into golf ball-sized portions. Roll each into a smooth ball with your hands. Place them on the prepared baking sheet, spacing about 2 inches apart.
- Lightly spray or brush the cheese balls with oil to promote even browning and crispiness. Pop the tray into the oven. Bake for 15-20 minutes, until golden and crispy on the outside.
- Halfway through baking, turn the cheese balls gently with a spatula for even color. Keep an eye on them after 15 minutes to prevent burning. The exterior should turn a deep golden hue, and they should smell cheesy and toasted.
- Once baked, remove from oven and let rest for 3-5 minutes. They’ll be hot and melty inside. Serve immediately with a sprinkle of fresh herbs or a dipping sauce of your choice.
- For best texture, avoid over-baking—cheese should be gooey inside, not dry. If they crack or lose their shape, check your oven temperature or breadcrumb mixture consistency.
Let the cheese balls rest on the baking sheet for 3-5 minutes. Serve warm, garnished with herbs or your favorite dipping sauces. They’re best enjoyed fresh but can be stored in an airtight container for up to a day, reheated briefly in the oven to revive crispness.
How to Know It’s Done
- Golden-brown exterior with a slight shimmer from the oil spray.
- Cheese inside should jiggle slightly when gently shaken, indicating gooeyness.
- Outer surface should be crisp and crackly, not soggy or pale.
Baked Cheese Balls
Ingredients
Equipment
Method
- In a mixing bowl, combine shredded cheese, grated Parmesan, paprika, salt, and pepper. Mix well until evenly incorporated.
- Add the beaten egg to the cheese mixture and stir until the mixture becomes sticky and slightly cohesive.
- Sprinkle in the panko breadcrumbs gradually, folding them into the mixture until it holds together and is easy to form into balls.
- Using a small scoop or spoon, portion out golf ball-sized amounts of the mixture. Roll each portion between your palms to form smooth, round balls.
- Place the cheese balls on the prepared baking sheet lined with parchment or a silicone mat, spacing them about 2 inches apart.
- Lightly spray or brush the tops of the cheese balls with oil to help them crisp up evenly during baking.
- Bake the cheese balls in a preheated oven at 200°C (390°F) for 15-20 minutes, or until they turn a deep golden brown and develop a crispy exterior.
- Halfway through baking, gently turn the cheese balls with a spatula to ensure even coloring and crispiness.
- Remove the baked cheese balls from the oven and let them rest for 3-5 minutes; they will be hot and melty inside but crisp on the outside.
- Serve the cheese balls warm, garnished with a sprinkle of fresh herbs or with your favorite dipping sauce for an extra touch of flavor.
Pro tips for crispy cheese balls
- Use a high-quality, aged cheese for a more flavorful bite.
- Chill the cheese mixture before shaping to prevent sticking and make rolling easier.
- Spray or brush the cheese balls with oil before baking for maximum crispiness.
- Turn the cheese balls halfway through baking to ensure even golden coloration.
- Keep an eye on the oven during the last few minutes to prevent over-browning, aiming for a deep golden hue.
- Let the baked cheese balls rest for a few minutes after baking; they’ll set up and stay crispy longer.
- For an extra crunch, toss the baked cheese balls in additional breadcrumbs or crushed nuts right after baking.
Common mistakes and how to fix them
- FORGOT to preheat oven → Always preheat for even cooking and crispiness.
- DUMPED cheese mixture too early → Chill mixture 10 minutes for better handling.
- OVER-TORCHED cheese balls → Reduce oven temp or bake for shorter time.
- DIDN’T spray oil evenly → Use a light, even spray for crispy coating.
Quick fixes and pantry swaps
- When cheese oozes out → Chill mixture longer before shaping.
- If cheese balls stick → Lightly dust hands with flour or water.
- Splash oil too heavily → Use a light spray for crisping.
- DUMPED cheese balls too early → Rest them 2 minutes before serving.
- When breadcrumbs burn → Reduce oven temp or bake at 190°C (375°F).
Prep, store, and reheat tips
- You can prepare the cheese mixture a day in advance; keep it chilled in the fridge for a firmer texture and easier shaping.
- Baked cheese balls can be stored in an airtight container in the fridge for up to 24 hours. Reheat in a 180°C (350°F) oven until crispy and heated through, about 5-7 minutes, until they shimmer with warmth and a faint crackle.
- For longer storage, freeze the unbaked cheese balls on a tray, then transfer to an airtight bag. They’ll keep for up to a month. Bake directly from frozen, adding an extra 5 minutes to the baking time.
- Reheated cheese balls lose some crispness but remain gooey inside. To restore crunch, briefly broil them for 1-2 minutes, watching closely so they don’t burn. The smell of toasted cheese will tell you they’re ready.
Top questions about baked cheese balls
1. How do I know when baked cheese balls are done?
Look for a golden-brown color and a crispy exterior. Gently shake the tray—if they jiggle slightly and smell cheesy and toasted, they’re ready.
2. What texture should I expect inside?
They should be crispy on the outside and gooey inside. If they’re too soft or runny, give them a few more minutes, but don’t overbake or they’ll turn dry.
3. Can I use different cheeses?
Use a mixture of cheddar and Parmesan for flavor, but mozzarella makes them extra gooey. Adjust according to your taste or what you have.
4. Can I make these ahead of time?
Yes, but avoid very soft cheeses that melt completely, as they might leak out during baking. Firm cheeses hold shape better.
5. How far in advance can I prep these?
You can prepare the cheese mixture a day ahead and keep it chilled. Bake just before serving for the freshest crunch.
6. How do I reheat baked cheese balls?
Reheat in a 180°C (350°F) oven for 5-7 minutes until they shimmer and crackle. This restores crispness without drying them out.
7. Why are my cheese balls soggy?
If they turn out soggy, check your oven temperature—too low or baking too long can cause moisture buildup. Ensure your oven is properly preheated.
8. What breadcrumbs work best?
Use panko breadcrumbs for extra crunch, but regular fine breadcrumbs work if you prefer a softer outside—just watch the color.
9. How long should I bake them?
Avoid over-baking; check around 15 minutes. They should turn deep golden and smell toasted but not burnt.
10. Can I freeze these?
Yes, you can freeze unbaked cheese balls on a tray, then transfer to a bag. Bake directly from frozen, adding a few extra minutes.
These baked cheese balls are more than just a snack; they’re a reminder that simple ingredients, when treated right, can turn into something truly satisfying. The crispy exterior and gooey interior paired with a warm, cheesy aroma make them hard to resist, especially during cozy evenings or casual gatherings.
Whenever I make these, I’m reminded of late-night kitchen experiments and the joy of tweaking a recipe until it feels just right. They’re imperfect, a little messy, but always better than I remembered—perfect for sharing, or just sneaking a few bites when no one’s looking.

Hi, I’m Claire Dawson, and I’m the voice behind The Procrastinators Cookbook. Food has always followed me around, even when I was busy putting other things off. Somewhere between long café shifts, half-finished to-do lists, and meals cooked later than planned, I realized that food was the one thing I always came back to.