There’s something about a simple skewer that feels honest, a bit rustic, and totally forgiving. It’s not about perfection or fancy ingredients, but about embracing that imperfect char, the smoky edges, and the way the marinade seeps into every nook and cranny of the chicken. This baked version keeps it easy, with less fuss than grilling but still plenty of that satisfying, homey flavor.
I’ve always loved how these skewers can be thrown together quickly, yet somehow taste like a meal that’s been simmering in slow-cooked goodness. It’s a dish that reminds me of family dinners, messy hands, and the joy of pulling something warm, fragrant, and a little charred from the oven. No need for fancy tools—just good chicken, simple spices, and a little patience.
And really, it’s the beauty of the everyday that makes this recipe worth making. No marinades that take hours, no complicated techniques—just honest ingredients, roasted to golden perfection, with bits of caramelized onion or peppers if you have them. It’s the kind of meal that feels like a warm hug after a long day, honest and unpolished, but deeply satisfying.
Focusing on the overlooked beauty of simple, rustic skewers—embracing the imperfect char and everyday flavors that make this dish feel honest and approachable.
The inspiration behind this dish
- This recipe came from a weekend of trying to make something quick, satisfying, but still flavorful enough to feel special. I wanted to avoid the usual fuss of marinades that need hours—sometimes you just need dinner on the table fast, but with character. Baking the skewers turned out to be a happy accident that gave me that crispy edge I love, without the flare-ups of outdoor grilling.
- One evening, I was rummaging through the fridge, looking for something to throw together after a long day. The chicken was already cut into chunks, and I remembered how I used to love those smoky, charred notes from the grill. Instead of firing up the grill, I decided to try baking them, and the result was surprisingly satisfying—juicy, tender, with a caramelized finish that felt like a little celebration of everyday cooking.
- heading
- story_type
Ingredient breakdown: key components
- Chicken thighs: I prefer boneless, skinless thighs—they stay juicy and have a richer flavor that roasts beautifully, but you can swap in breasts if you prefer leaner meat—just watch them so they don’t dry out.
- Bell peppers: I love using colorful bell peppers—they add a sweet, smoky aroma and a pop of color. For a milder flavor, go for red; for more bite, try green or yellow.
- Garlic: Fresh minced garlic gives the marinade a punch—smell that sharp, pungent scent when you mix it in. If you’re pressed for time, garlic powder works, but it won’t deliver quite the same zing.
- Olive oil: I use good-quality extra virgin—it helps the spices cling and keeps everything moist. If you’re out, a neutral oil like canola is fine, but you might miss that fruity undertone.
- Lemon juice: Brightens everything up—look for fresh lemons for that zesty, almost zingy aroma. Bottled lemon juice is okay in a pinch, but it’s less vibrant.
- Spices (paprika, cumin, salt): I keep it simple with smoked paprika and cumin—they give a warm, smoky depth and a hint of earthiness. Feel free to dial up the heat with chili powder if you like it spicy.
- Skewers: Wooden skewers are easiest, but soak them in water for at least 30 minutes beforehand to prevent burning. Metal skewers are fuss-free, but I love how they get that charred edge—just watch for hot handles!
Spotlight on key ingredients
Chicken thighs:
- I prefer boneless, skinless thighs—they stay juicy and have a richer flavor that roasts beautifully, but you can swap in breasts if you prefer leaner meat—just watch them so they don’t dry out.
- Bell peppers: I love using colorful bell peppers—they add a sweet, smoky aroma and a pop of color. For a milder flavor, go for red; for more bite, try green or yellow.
Garlic & Olive Oil:
- Garlic: Fresh minced garlic gives the marinade a punch—smell that sharp, pungent scent when you mix it in. If you’re pressed for time, garlic powder works, but it won’t deliver quite the same zing.
- Olive oil: I use good-quality extra virgin—it helps the spices cling and keeps everything moist. If you’re out, a neutral oil like canola is fine, but you might miss that fruity undertone.
Notes for ingredient swaps
- Dairy-Free: Skip creamy marinades or yogurt dips—use extra lemon juice or vinegar for acidity and brightness.
- Gluten-Free: Ensure your soy sauce is tamari or coconut aminos—regular soy sauce contains gluten and can overpower delicate flavors.
- Vegetarian: Replace chicken with firm tofu or mushroom pieces—marinate longer to build flavor and achieve a smoky, savory edge.
- Sweetness Swap: Use honey or maple syrup instead of sugar in the marinade—adds a caramelized, sticky glaze and a hint of floral sweetness.
- Spice Level: Adjust chili or cayenne—more for heat, less if you prefer milder skewers, without losing the smoky depth.
- Oil Choice: Swap olive oil for sesame or avocado oil—each adds a different aromatic note and smoke point, but keeps the glaze moist.
- Vegetables: Swap peppers for zucchini or cherry tomatoes—keep size consistent for even roasting and flavor balance.
Equipment & Tools
- baking sheet: To hold skewers and catch drips in the oven.
- metal or soaked wooden skewers: To thread the chicken and vegetables for even cooking.
- mixing bowl: To prepare and toss the marinade.
- brush: To coat and baste the skewers with marinade.
Step-by-step guide to baked skewers
- Gather your equipment: a baking sheet, metal or soaked wooden skewers, a bowl for marinade, and a brush for basting.
- Preheat your oven to 200°C (390°F). Line the baking sheet with parchment or foil for easy cleanup.
- Cut chicken thighs into 1.5-inch chunks. If using breasts, watch carefully for overcooking.
- Mix marinade: whisk together olive oil, lemon juice, minced garlic, smoked paprika, cumin, and a pinch of salt in the bowl.
- Thread chicken pieces onto skewers, leaving a little space to prevent overcrowding. Add peppers or onions if desired.
- Brush the skewers generously with marinade, ensuring all sides are coated. Let sit for 10 minutes if time permits.
- Arrange skewers on the prepared baking sheet, spaced evenly. Bake for 15–20 minutes, turning once halfway through.
- Check for golden-brown edges and a slight char on the tips. The chicken should be juicy, not dry.
- Optional: broil for 2–3 minutes at the end for extra char—keep a close eye so they don’t burn.
- Remove from oven and let rest for 5 minutes. The resting period helps juices redistribute, keeping meat tender.
- Serve skewers with a squeeze of lemon or fresh herbs. Plate alongside rice, salad, or pita if you like.
Let the skewers rest for 5 minutes to lock in juices, then serve hot with lemon wedges or fresh herbs for extra brightness.
How to Know It’s Done
- Chicken juices run clear when pierced with a skewer.
- Surface is golden with slight charring and caramelization.
- Meat feels firm but not rubbery when pressed gently.
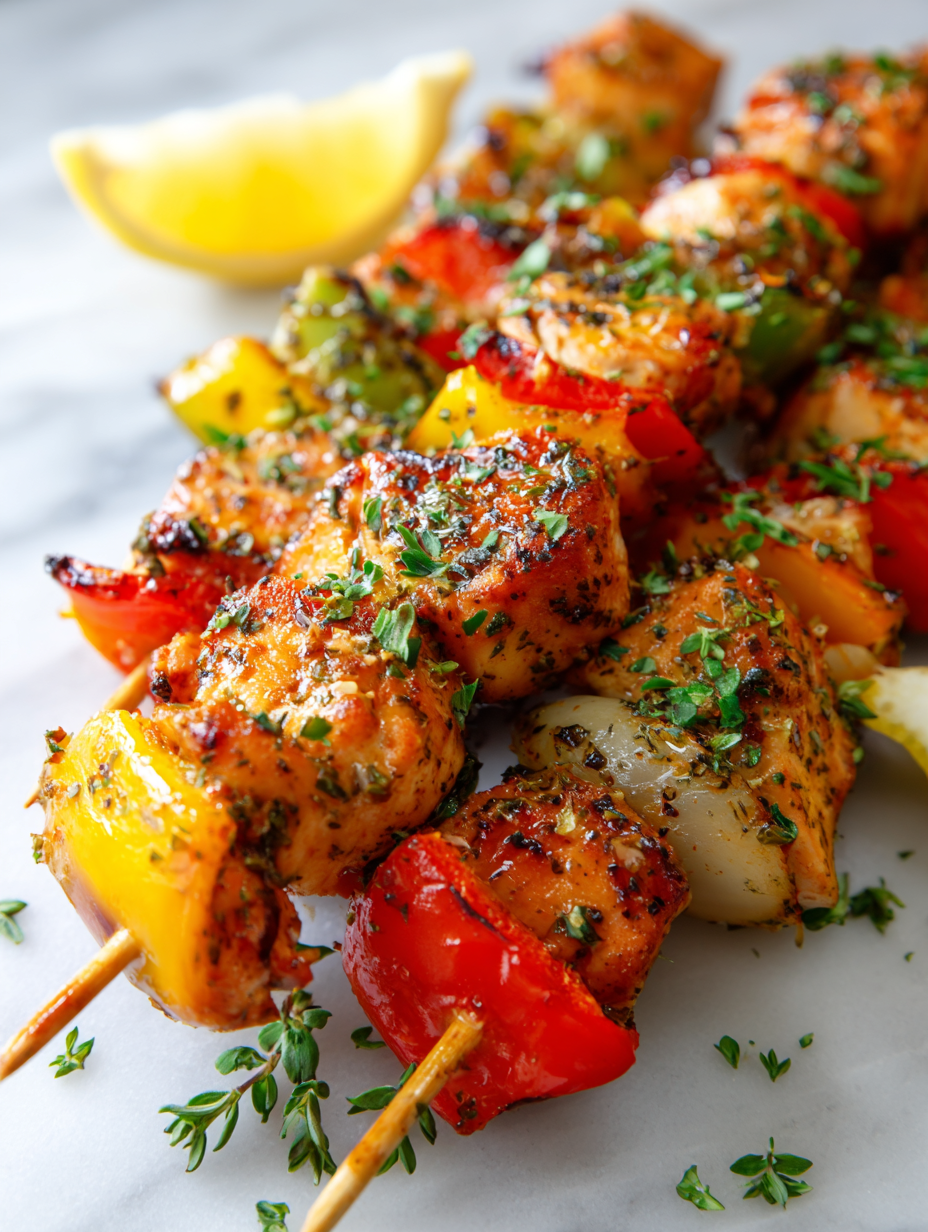
Baked Rustic Chicken Skewers
Ingredients
Equipment
Method
- Preheat your oven to 200°C (390°F) and line a baking sheet with parchment or foil for easy cleanup.
- Combine minced garlic, olive oil, lemon juice, smoked paprika, cumin, and a pinch of salt in a mixing bowl. Whisk until well blended and fragrant.
- Add the chicken chunks to the marinade and toss gently to coat all pieces evenly. Let sit for at least 10 minutes to absorb the flavors.
- Thread the marinated chicken pieces onto skewers, alternating with colorful bell pepper chunks to add vibrant color and sweetness.
- Place the skewers onto the prepared baking sheet, spacing them slightly apart to allow even roasting.
- Bake in the oven for 15–20 minutes, turning the skewers once halfway through, until the chicken is golden with a slight char and juices run clear.
- Optional: broil the skewers for an additional 2–3 minutes to enhance the charred, smoky edges, watching closely to prevent burning.
- Remove the skewers from the oven and let rest for 5 minutes, allowing the juices to redistribute and keeping the meat tender.
- Finish with a squeeze of fresh lemon and a sprinkle of herbs if desired, then serve hot with your favorite sides.
Pro tips for perfect skewers
- Use high heat to get that crispy, golden exterior—preheat your oven thoroughly before roasting.
- Keep an eye on the skewers during broiling—just 2-3 minutes for extra char, but burnage happens fast.
- Baste generously with marinade before baking—this helps keep the chicken moist and adds flavor layers.
- Rest the skewers for 5 minutes after baking—juices redistribute, ensuring tender bites with each pull.
- Soak wooden skewers for at least 30 minutes—prevents them from catching fire in the oven.
- Thread chicken with a little space in between—allows heat to circulate for even cooking and caramelization.
- Use a meat thermometer—aim for 75°C (165°F) in the thickest part to confirm doneness without overcooking.
Common mistakes and how to fix them
- FORGOT to soak wooden skewers → Soak at least 30 minutes to prevent burning.
- DUMPED marinade too early → Marinate for at least 10 minutes for flavor penetration.
- OVER-TORCHED skewers → Broil briefly at the end, watch closely to avoid burning.
- UNDERRATED oven temp → Ensure 200°C (390°F) for proper roasting and caramelization.
Quick fixes and pantry swaps
- When skewers burn, splash with a little water to stop the flare-up.
- If chicken is undercooked, patch with extra time in the oven at 200°C (390°F).
- Dumped marinade too early? Rest the skewers for deeper flavor absorption.
- Over-torched edges? Shield with foil and broil briefly for perfect char.
- Pantry swap: use smoked paprika instead of regular for extra smoky depth.
Prep, store, and reheat tips
- Marinate the chicken and vegetables up to 24 hours ahead in the fridge; the flavors deepen and the meat stays juicy.
- Assemble the skewers a day in advance and keep covered in the fridge—this saves time on busy days and the ingredients stay fresh.
- Store cooked skewers in an airtight container in the fridge for up to 3 days; reheat in the oven at 180°C (350°F) for about 10 minutes until warm and fragrant.
- Reheating will intensify the smoky aroma and keep the chicken moist if warmed carefully—avoid microwaving to prevent drying out.
- For best flavor, serve skewers immediately after reheating, with a squeeze of lemon or fresh herbs for that just-cooked brightness.
Top questions about baked chicken skewers
1. Can I use chicken breasts instead of thighs?
Use chicken thighs for juiciness and flavor, but breasts work if you prefer leaner meat—just watch the cooking time.
2. Do I need to soak wooden skewers?
Soak wooden skewers in water for at least 30 minutes before threading the chicken. Metal skewers need no prep.
3. How long should I bake the skewers?
Bake at 200°C (390°F) for 15-20 minutes, turning once. Look for golden color and slight char for doneness.
4. How long should I marinate the chicken?
Marinate for at least 10 minutes to soak up flavors. Longer marinating enhances taste but isn’t essential for quick prep.
5. How do I know when the chicken is cooked?
Use a meat thermometer to check for 75°C (165°F) in the thickest part of the chicken. Juices should run clear.
6. How do I reheat leftovers?
Reheat in the oven at 180°C (350°F) for about 10 minutes. The skewers should be hot, fragrant, and moist inside.
7. Can I make the skewers spicier?
Adjust spices according to your heat preference. Add chili powder or cayenne for more spice, or skip for milder flavor.
8. Can I substitute lemon juice?
Use fresh lemon juice for brightness and vibrant aroma. Bottled lemon works in a pinch but lacks zing.
9. How should I thread the chicken?
Ensure even spacing when threading chicken on skewers for uniform cooking and caramelization on all sides.
10. Should I broil the skewers at the end?
Watch during broiling—just 2-3 minutes for extra char. Keep a close eye to prevent burning.
These baked chicken skewers remind me that simple ingredients, when treated honestly, can create real comfort. The smoky aroma, the crispy edges, and tender meat—it’s a straightforward dish that feels like a small victory in everyday cooking.
Whenever I make these, I appreciate how a modest oven can turn basic chicken and peppers into something memorable. They’re perfect for busy nights or casual gatherings, offering honest flavor without fuss. Sometimes, the simplest meals leave the strongest impressions.

Hi, I’m Claire Dawson, and I’m the voice behind The Procrastinators Cookbook. Food has always followed me around, even when I was busy putting other things off. Somewhere between long café shifts, half-finished to-do lists, and meals cooked later than planned, I realized that food was the one thing I always came back to.