There’s something about the smell of garlic baking that instantly takes me back to family dinners around the table. It’s not just about the bread itself, but that warm, nostalgic feeling of shared moments and messy hands reaching for more. Baking garlic bread at home feels like creating a little piece of that comfort, one slice at a time.
This recipe isn’t about perfection or fancy ingredients. It’s about that irresistible aroma that fills the kitchen, the crust that’s just crispy enough, and the butter-garlic spread that’s oozy and fragrant. Honestly, it’s my go-to for when I want something cozy but with a touch of indulgence that makes everyone smile without fuss.
Sometimes, I toss in a sprinkle of fresh herbs or a dash of cheese—little tweaks that make it feel fresh and personal. But really, the magic is in the simple process, the smell that makes everyone gather around, and that first bite that’s buttery, garlicky, and just a little charred around the edges.
Focusing on how the aroma of garlic bread can evoke nostalgic memories of family gatherings, making it not just a side but a sensory experience that connects us to those moments.
The story behind this recipe
- This garlic bread recipe comes from a lazy Sunday afternoon, when I was craving something warm and fragrant but didn’t want to fuss. I remember the kitchen filling with that irresistible smell of butter and garlic, and realizing how simple ingredients could turn into something so comforting. It’s become a little ritual to whip up when I need a quick, cozy snack or a side that everyone reaches for.
- One day, I tossed in a handful of fresh parsley just to brighten it up, and that burst of green made it feel like a special treat. Since then, I’ve kept tweaking it—sometimes with a sprinkle of cheese, sometimes not—always aiming for that perfect balance of crispy, oozy, and aromatic. It’s funny how something so straightforward can spark so many nostalgic moments around my table.
- heading: ‘The story behind this recipe’
Key ingredients and tips
- Unsalted butter: I like it soft and creamy, which helps spread easily and melts into the bread, creating that rich, velvety feel. Swap with margarine if you want a lighter touch, but the butter’s aroma is what makes it special.
- Garlic: Fresh is king here—crushed until fragrant, it releases a sharp, pungent scent that transforms once baked. If you’re in a pinch, roasted garlic gives a milder, sweeter vibe, but don’t skip that raw punch.
- French bread: A crusty baguette or rustic loaf gives the best chew and crispy edges. For softer bread, try a sourdough or even a ciabatta; just expect a different texture, less crunch but still flavorful.
- Parsley: Chopped fresh parsley adds a bright, herbal contrast to the garlic butter. If you don’t have fresh, dried works in a pinch, but it’ll lose that vibrant pop and freshness.
- Olive oil: A drizzle helps the butter spread smoothly and adds a slight smoky note when baked. Skip it if you prefer a richer, butter-only flavor, but your bread might not crisp up quite as well.
- Salt: I use a good pinch to enhance all those flavors. If you’re watching salt intake, reduce slightly, but remember, it’s what makes the garlic and butter sing.
- Optional cheese: A sprinkle of Parmesan or mozzarella can add gooeyness and depth. Use it if you want a richer, more indulgent crust, but don’t overdo it—let the garlic shine.
Spotlight on key ingredients
Garlic:
- When crushed, releases a sharp, pungent aroma that transforms into a warm, nutty scent during baking. It’s the backbone of the bread’s flavor.
- During roasting, it becomes sweet and mellow, balancing that initial punch with a deep, caramelized richness. Its behavior during baking can be unpredictable—watch for burning if overexposed.
Butter:
- I prefer unsalted, soft and velvety, which spreads easily and melts into the bread, creating that luscious, oozy texture. Its rich aroma is what makes this bread irresistible.
- When baked, it bubbles and crisps the edges, adding a golden hue. It’s essential for that fragrant, buttery finish that makes each bite decadently rich.
Notes for ingredient swaps
- Dairy-Free: Swap butter for coconut oil or dairy-free margarine. It won’t be as rich but still flavorful and fragrant.
- Vegan: Use vegan butter or olive oil to keep it plant-based. Expect a slightly different mouthfeel but still tasty.
- Gluten-Free: Choose a sturdy gluten-free bread or baguette. Watch for crumbling and adjust baking time if needed.
- Fresh Herbs: Fresh parsley, basil, or chives add brightness. Dried herbs work in a pinch but lose vibrancy and aroma.
- Garlic: Roasted garlic offers a milder, sweeter flavor, perfect if you want less pungency in your bread.
- Olive Oil: Replace part of the butter with good-quality olive oil for a slightly smoky, fruity note.
- Cheese: Add grated Parmesan or mozzarella for gooeyness and depth. Skip if you prefer pure garlic butter.
Equipment & Tools
- Serrated bread knife: To slice the loaf cleanly without squishing the bread.
- Mixing bowl: To blend garlic, butter, and herbs into an even spread.
- Baking sheet with parchment: To hold the bread during baking and prevent sticking.
- Spatula or butter knife: To spread the garlic butter evenly over the bread.
Step-by-step guide to baked garlic bread
- Equipment & Tools: gather a serrated bread knife for slicing, a mixing bowl for the garlic butter, and a baking sheet lined with parchment for easy cleanup.
- Preheat the oven to 200°C (392°F). Make sure the rack is in the middle for even baking.
- Slice the loaf: cut the bread in half lengthwise, then into manageable pieces if desired, but keep it connected so it bakes evenly.
- Prepare garlic butter: in the mixing bowl, mash 4-5 cloves of garlic until fragrant, then stir in ½ cup softened unsalted butter, a pinch of salt, and chopped parsley if using.
- Spread generously: use a butter knife or spatula to slather the garlic butter all over the cut sides of the bread, making sure to get into the nooks and crannies.
- Bake: place the bread halves cut-side up on the prepared sheet. Bake for 15-20 minutes, until the edges are golden and crispy, and the butter is bubbling.
- Check for doneness: the bread should be crusty around the edges, and the garlic butter should be oozy and fragrant. If it’s not quite there, give it a few more minutes, but watch for burning.
- Optional broil: for extra crispness, switch to broil for 1-2 minutes, watching carefully to avoid charring.
- Rest: remove from the oven and let sit for 2 minutes. The butter will settle in, making it easier to cut and serve without excess drips.
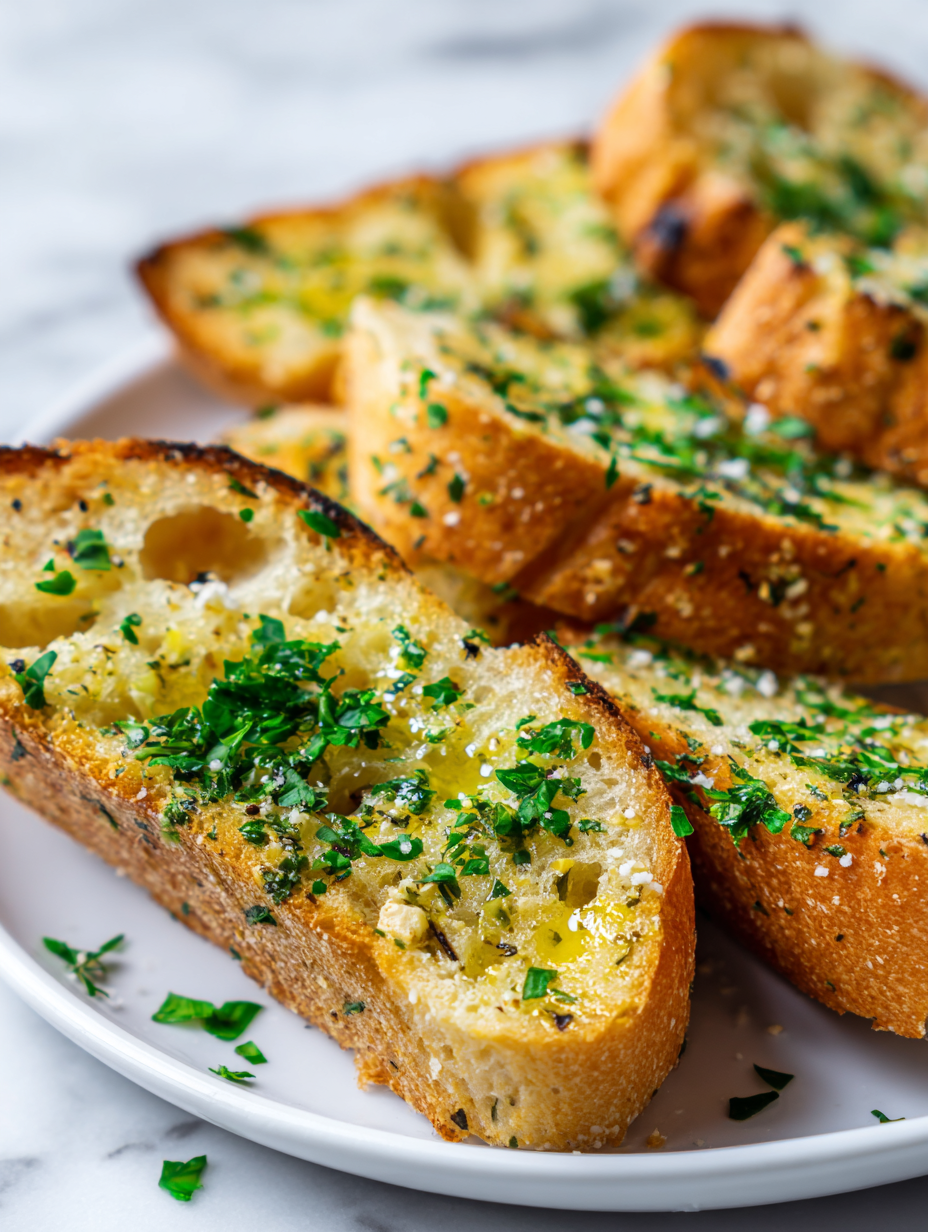
- Serve: slice into pieces and enjoy while warm, with the aroma filling the room—crispy edges, fragrant garlic, and buttery richness.
Rest the baked bread for 2 minutes before slicing. Serve warm, letting the butter settle into the crispy edges. Present on a wooden board or platter, with a little extra parsley if desired.
How to Know It’s Done
- Edges are golden and crispy, with bubbling butter visible.
- Garlic aroma is fragrant and not burnt.
- Bread feels firm but tender when gently pressed.
Homemade Garlic Bread
Ingredients
Equipment
Method
- Start by slicing the loaf lengthwise in half with a serrated bread knife, revealing the soft interior and crispy crust.
- In a mixing bowl, mash the garlic cloves until fragrant and slightly paste-like.
- Add the softened butter to the garlic and stir until well combined, creating a fragrant, creamy garlic butter.
- Stir in chopped parsley and a pinch of salt, then mix again to evenly distribute the herbs and seasoning.
- Use a spatula or butter knife to generously spread the garlic butter mixture all over the cut sides of the bread, pressing into the crevices for maximum flavor.
- Place the bread halves cut-side up on a baking sheet lined with parchment paper. Bake in a preheated oven at 200°C (392°F) for 15-20 minutes, until the edges are golden and crispy, and the butter is bubbling.
- Optional: For an extra crispy top, switch to broil mode for 1-2 minutes, keeping a close eye to prevent burning.
- Remove from the oven and let rest for 2 minutes, allowing the butter to settle and making it easier to slice without excess drips.
- Slice into individual pieces and serve warm, enjoying the crispy edges, fragrant garlic aroma, and tender, buttery interior.
Notes
Pro tips for perfect garlic bread
- Bolded mini-head: Use room temperature butter for easy spreading and even melting, enhancing that fragrant, oozy texture.
- Bolded mini-head: Crush garlic thoroughly; it releases more aroma and ensures even distribution through the butter mixture.
- Bolded mini-head: For a crispier top, broil the bread for the last 1-2 minutes, but keep a close eye to avoid charring.
- Bolded mini-head: Spread the garlic butter generously, pressing it into the nooks to maximize flavor and gooeyness.
- Bolded mini-head: Bake on the middle rack at 200°C (392°F) for even heat distribution and perfect golden edges.
- Bolded mini-head: If butter starts to brown too quickly, lower the oven temperature slightly or move to a lower rack.
- Bolded mini-head: Rest the bread for 2 minutes after baking; this allows the butter to settle, preventing excess drips when slicing.
Common mistakes and how to fix them
- FORGOT to preheat the oven → Always preheat to ensure even baking and crisp edges.
- DUMPED the garlic directly on bread → Mince garlic finely for even flavor distribution.
- OVER-TORCHED the edges → Watch carefully under the broiler to prevent burning.
- USED too much butter → Stick to the recommended amount for balanced richness and crunch.
Quick fixes and pantry swaps
- When bread is stale, splash it with a little water before baking to revive crispness.
- If garlic burns and turns bitter, patch with a fresh garlic clove and reduce oven heat slightly.
- DUMPED too much butter? Shield edges with foil and continue baking for even crispness.
- Over-torched edges? Rescue by lowering the oven temp and broiling for just 1 minute.
- When aroma shimmers but bread isn’t crisp enough, quick broil for 1-2 minutes to finish.
Prep, store, and reheat tips
- Prep the garlic butter mixture up to 1 day ahead; store in an airtight container in the fridge. The aroma will deepen overnight.
- Assemble the bread and garlic butter a few hours before baking; keep covered at room temperature to prevent drying out.
- Store leftover baked garlic bread tightly wrapped in foil or in an airtight container for up to 2 days. The aroma may fade slightly, but it will still be tasty.
- Reheat slices in a 180°C (350°F) oven for 5-7 minutes until crispy and fragrant. You’ll notice the butter bubbling and the edges crackling.
- For longer storage, freeze baked garlic bread wrapped well in foil for up to 1 month. Reheat directly from frozen for a crispy finish, smelling roasted and garlicky.
Top questions about baked garlic bread
1. Can I use pre-minced garlic?
Use fresh garlic for that sharp, pungent punch and vibrant aroma. Store-bought pre-minced can work, but it loses some intensity.
2. Can I make this dairy-free?
Yes, swap with olive oil or margarine if you need a dairy-free version. The flavor will be slightly less rich but still delicious.
3. How do I know when it’s done?
Bake until the edges are golden and crispy, about 15-20 minutes. You’ll see bubbling butter and a fragrant garlic smell.
4. Can I use other types of bread?
Use a sturdy baguette or rustic loaf for the best crust and chewy interior. Soft bread like sandwich bread won’t give that crispy edge.
5. Can I prepare this in advance?
Make the garlic butter ahead of time, store in the fridge for up to 1 day, or freeze for longer. Just bring to room temperature before spreading.
6. What if the garlic burns?
If the garlic burns and turns bitter, cover the bread loosely with foil and bake a few more minutes to mellow the flavor.
7. How can I make it crispier?
Brush the bread with olive oil before baking for extra crispness and a smoky aroma. It also helps prevent burning garlic.
8. How do I reheat leftovers?
Slice the bread, then reheat in a 180°C (350°F) oven for 5-7 minutes until fragrant and crispy. Keep an eye to avoid burning.
9. Can I add cheese?
Add grated Parmesan or mozzarella before baking for gooey, cheesy tops. Skip if you want pure garlic flavor without dairy.
10. Should I soften the butter first?
Use room temperature butter for easy spreading and even melting. It creates a more fragrant, oozy garlic bread experience.
This baked garlic bread isn’t just a side—it’s a small, fragrant ritual that turns a simple meal into something memorable. The smell alone, warm and pungent with garlic and butter, can fill a room with nostalgia and anticipation.
Sharing it with others, watching their faces light up at that first crispy, buttery bite, makes all the effort worth it. Sometimes, it’s these humble, honest recipes that remind us why we love cooking in the first place.

Hi, I’m Claire Dawson, and I’m the voice behind The Procrastinators Cookbook. Food has always followed me around, even when I was busy putting other things off. Somewhere between long café shifts, half-finished to-do lists, and meals cooked later than planned, I realized that food was the one thing I always came back to.