There’s something almost magical about the way mushroom caps can be transformed into a rich, savory bite. It’s like capturing a little piece of earth’s umami-packed essence, then elevating it with just the right touch of seasoning and a secret ingredient I keep close. These baked mushroom caps aren’t just a snack—they’re a conversation starter at any dinner table, especially when you want to impress without much fuss.
I’ve always loved how versatile mushrooms are, especially when roasted to that perfect, slightly smoky finish. But I rediscovered this trick—adding a whisper of smoked paprika and a dash of truffle oil—that turned the humble mushroom into something memorable. It’s a simple recipe, sure, but it’s the kind that makes you rethink what an ordinary veggie can do when you give it a little extra love.
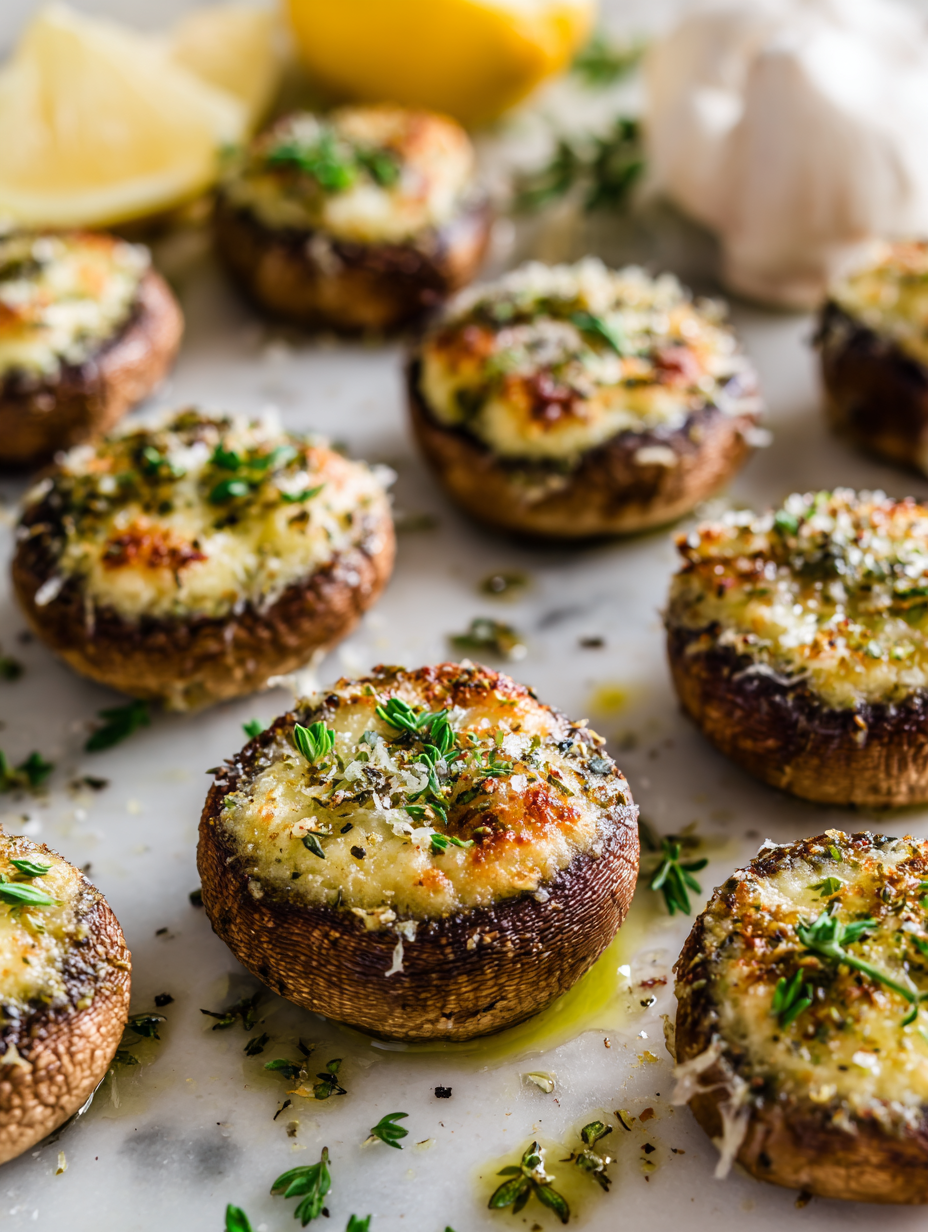
Focusing on how the earthy, umami-rich flavor of baked mushroom caps can be elevated by a secret ingredient, transforming them from simple snacks to a memorable, conversation-starting appetizer.
The inspiration behind this dish
- This recipe came together on a lazy Sunday afternoon when I needed something quick, warm, and deeply satisfying. I remember the first time I tried roasting mushroom caps with garlic and a splash of balsamic—it was a revelation, how the earthy aroma filled the kitchen and made the whole house smell like fall. Since then, I’ve been tweaking that simple idea, adding a secret ingredient that elevates the whole dish into something special.
- What really anchors this recipe for me is a memory of my grandmother, who always kept a jar of preserved truffle oil in her pantry. That tiny splash transformed humble ingredients into something luxurious, even on a weeknight. Now, whenever I make baked mushroom caps, I think of her and that feeling—how a little touch can turn an ordinary moment into a celebration.
- heading
- story_type
Key ingredients for flavor and texture
- Button mushrooms: I love using large, meaty caps—they hold all that savory stuffing beautifully. You can swap with portobellos if you want a more robust bite.
- Olive oil: A drizzle of good extra virgin adds a rich, fruity note that helps the caps brown evenly. Skip it if you’re oil-free, but expect a slightly drier finish.
- Garlic: Finely minced garlic infuses a warm, pungent aroma that awakens the earthiness. Roast it with the mushroom for a mellow, sweet undertone.
- Breadcrumbs: I prefer panko for crunch, but regular panko works fine. Toast them lightly in butter beforehand for extra flavor and texture.
- Cheese: Sharp Parmesan adds a salty, nutty kick, especially when melted and bubbly. Swap with pecorino for a more intense tang, or skip for vegan version.
- Secret ingredient (truffle oil): Just a tiny splash transforms the earthy, umami depth—be careful, it’s potent and fragrant. You can substitute with a few drops of mushroom soy if you want that richness without the floral note.
- Lemon juice: Brightens everything with a zingy punch that cuts through the richness. A squeeze at the end really lifts the flavors and adds freshness.
Spotlight on key ingredients
Button mushrooms:
- I love using large, meaty caps—they hold all that savory stuffing beautifully. You can swap with portobellos if you want a more robust bite.
- Olive oil: A drizzle of good extra virgin adds a rich, fruity note that helps the caps brown evenly. Skip it if you’re oil-free, but expect a slightly drier finish.
- Garlic: Finely minced garlic infuses a warm, pungent aroma that awakens the earthiness. Roast it with the mushroom for a mellow, sweet undertone.
Breadcrumbs and cheese:
- Secret ingredient (truffle oil): Just a tiny splash transforms the earthy, umami depth—be careful, it’s potent and fragrant. You can substitute with a few drops of mushroom soy if you want that richness without the floral note.
- Breadcrumbs: I prefer panko for crunch, but regular panko works fine. Toast them lightly in butter beforehand for extra flavor and texture.
- Cheese: Sharp Parmesan adds a salty, nutty kick, especially when melted and bubbly. Swap with pecorino for a more intense tang, or skip for vegan version.
Notes for ingredient swaps
- Dairy-Free: Use nutritional yeast instead of Parmesan for a cheesy flavor without dairy, though it’s less creamy and a bit nuttier.
- Vegan: Swap cheese for a plant-based cheese or additional herbs; expect a different melt and slightly altered flavor.
- Nutty Additions: Incorporate chopped walnuts or hazelnuts into the stuffing for crunch, but watch for added bitterness if overtoasted.
- Herb Variations: Use fresh thyme or rosemary instead of parsley for a more aromatic profile, which can be more pungent.
- Oil Choices: Replace olive oil with avocado or sesame oil for different flavor notes; keep in mind their distinct aromas and smoke points.
- Secret Ingredient Swap: If you don’t have truffle oil, a splash of mushroom soy or mushroom-infused oil can mimic that earthy depth.
- Breadcrumb Alternatives: Use crushed nuts or gluten-free oats in place of breadcrumbs for texture, but expect a different crunch and flavor.
Equipment & Tools
- Oven: Bake the mushroom caps evenly
- Baking sheet: Hold the mushrooms during baking
- Pastry brush: Apply garlic and oil mixture
- Small mixing bowls: Combine ingredients for stuffing and seasoning
- Paring knife: Remove mushroom stems and prepare caps
Step-by-step guide to baked mushroom caps
- Preheat your oven to 200°C (390°F). Line a baking sheet with parchment paper for easy cleanup.
- Gently clean the mushroom caps with a damp cloth. Remove stems carefully, leaving the cap intact. Set stems aside for another use or chop finely.
- In a small bowl, mix minced garlic, olive oil, and a pinch of salt. Brush this mixture generously inside each mushroom cap. This will help them brown and add flavor.
- In a separate bowl, combine breadcrumbs, grated Parmesan, a splash of truffle oil, and a squeeze of lemon juice. Mix well until evenly coated with oil and lemon zest.
- Stuff each mushroom cap with the breadcrumb mixture, pressing gently to fill the cavity without overflowing.
- Arrange the stuffed mushroom caps on the prepared baking sheet, leaving space between them. Bake for 15-20 minutes, until the tops are golden brown and the mushrooms are tender.
- Check for doneness: the breadcrumb topping should be crisp, and the mushrooms should have released some of their juices but still be firm. If over-browning, loosely cover with foil and continue baking.
- Remove from oven and let rest for 5 minutes. Drizzle with a little more truffle oil or lemon if desired. Serve warm, garnished with fresh herbs if you like.
Let the mushrooms rest for 5 minutes out of the oven. Finish with a drizzle of truffle oil or a squeeze of lemon for brightness. Serve directly from the baking sheet or plate neatly garnished with herbs.
How to Know It’s Done
- Breadcrumb topping is golden and crispy.
- Mushroom caps are tender but not mushy.
- Juices run slightly when pierced, but the caps hold shape.
Baked Mushroom Caps with Truffle Oil and Parmesan
Ingredients
Equipment
Method
- Preheat your oven to 200°C (390°F) and line a baking sheet with parchment paper. Gently wipe the mushroom caps clean with a damp cloth and carefully remove the stems, setting them aside.
- Mix the minced garlic with olive oil and a pinch of salt, then use a pastry brush to generously coat the inside of each mushroom cap. This helps them brown beautifully and infuses flavor.
- In a small bowl, combine the toasted breadcrumbs, grated Parmesan, a splash of truffle oil, and a squeeze of lemon juice. Mix until the ingredients are evenly coated and fragrant.
- Gently stuff each mushroom cap with the breadcrumb mixture, pressing softly to fill the cavity without overflowing. Arrange the stuffed caps on the prepared baking sheet.
- Bake the mushroom caps in the oven for about 15-20 minutes, until the topping is golden brown and crispy and the mushrooms are tender and juicy.
- Once baked, remove the mushrooms from the oven and let them rest for 5 minutes. Drizzle with a little more truffle oil or lemon if desired, and serve warm, garnished with fresh herbs if you like.
Pro tips for perfect baked mushroom caps
- Bold the mushroom caps: Use a paper towel to gently dry them after washing—moisture hinders browning.
- Oil the filling: Lightly brush the breadcrumb mixture with truffle oil for extra aroma and richness.
- Bake on high heat: 200°C (390°F) helps achieve a crispy topping without overcooking the mushrooms.
- Watch the breadcrumbs: Keep an eye for golden edges; they can burn quickly if left unattended.
- Use a spoon for stuffing: Gently press the filling into the caps for an even, tidy presentation.
- Rest before serving: Let the baked caps sit for 5 minutes—this helps juices redistribute and keeps them firm.
- Finish with a drizzle: A tiny splash of lemon or extra truffle oil just before serving adds a bright, fresh note.
Common mistakes and how to fix them
- FORGOT to preheat the oven → Always preheat for even baking and better crust.
- DUMPED too much oil → Use just a light drizzle to prevent sogginess.
- OVER-TORCHED the breadcrumbs → Keep an eye; breadcrumb burn ruins crunch and flavor.
- MISSED resting time → Resting helps flavors settle and prevents mushroom juices from leaking.
Quick fixes and pantry swaps
- When mushrooms release too much juice, splash with a little lemon to brighten the flavor.
- If breadcrumbs burn quickly, patch with a sprinkle of fresh herbs for color and aroma.
- DUMPED too much oil? Use a paper towel to absorb excess, keeping topping crisp.
- When filling seems sparse, open up the caps slightly and add more stuffing before baking.
- Splash a dash of soy sauce or tamari if you’re out of truffle oil for that umami shimmer.
Prep, store, and reheat tips
- Prepare the stuffing mixture and chop garlic a day ahead; store in an airtight container in the fridge. The aroma of garlic will intensify overnight.
- Clean and remove stems from mushroom caps up to 24 hours in advance. Keep them in a sealed container, lined with a paper towel to absorb excess moisture.
- Stuff the mushroom caps with the breadcrumb mixture up to 4 hours ahead. Cover tightly and refrigerate; the stuffing may absorb some moisture but will stay fresh.
- Reheat baked mushroom caps in a 180°C (350°F) oven for 8-10 minutes until warmed through and crispy on top. The aroma of toasted breadcrumbs will signal readiness.
- Shelf life: Store leftovers in an airtight container for 1-2 days. Reheat until bubbling and fragrant, with the breadcrumb topping crispy again. The mushrooms will release some juices, so serve promptly for best texture.
Top questions about baked mushroom caps
1. What kind of mushrooms work best?
Use large, fresh button mushrooms for the best flavor and texture. The caps should be firm but tender when baked.
2. How do I prevent mushrooms from drying out?
Brush the mushroom caps with olive oil and season well before baking. This enhances flavor and helps them brown nicely.
3. Can I make this in advance?
Yes, you can prepare the stuffing a few hours ahead and refrigerate. Assemble the caps just before baking for the freshest taste.
4. What temperature and how long should I bake them?
Bake at 200°C (390°F) for 15-20 minutes, until the topping is golden and crispy, and the mushrooms are tender.
5. Can I substitute the cheese?
You can swap Parmesan for pecorino or vegan cheese. Keep in mind, the flavor and melt will differ slightly.
6. How do I stuff the mushrooms properly?
Use a small spoon to fill each mushroom cap gently. Avoid overstuffing to prevent spilling over during baking.
7. Should I add anything after baking?
Add a splash of lemon juice after baking to brighten the flavors and cut through the richness.
8. How do I store and reheat leftovers?
Store leftovers in an airtight container in the fridge for up to 2 days. Reheat in a 180°C (350°F) oven until crispy.
9. How much truffle oil should I use?
The secret ingredient, truffle oil, adds a fragrant, earthy aroma. Use sparingly to avoid overpowering the dish.
10. What if the topping burns?
If breadcrumbs burn, cover the caps loosely with foil and continue baking. This prevents over-browning while the inside cooks through.
These baked mushroom caps are a little pocket of earthiness and umami, simple but memorable. They’re perfect for when you want something warm and satisfying without much fuss. Honestly, they remind me that sometimes the best bites come from just a few good ingredients and a bit of patience.
Plus, they’re versatile enough to adapt—swap cheeses, add herbs, or tweak the secret ingredient. They’re easy to make ahead, which is handy for busy nights or unexpectedly quick gatherings. In the end, it’s those little details that turn a humble mushroom into a real treat on the table.

Hi, I’m Claire Dawson, and I’m the voice behind The Procrastinators Cookbook. Food has always followed me around, even when I was busy putting other things off. Somewhere between long café shifts, half-finished to-do lists, and meals cooked later than planned, I realized that food was the one thing I always came back to.