What I love about these mini flatbread bites is how they turn something simple into a little celebration. It’s almost like playing with edible building blocks—each one customizable but still coming together quickly enough for a weeknight. Plus, they’re perfect for when you want snack-sized comfort that’s both satisfying and a little fancy.
There’s a cozy charm in gathering around a plate of these to share, especially when everyone can add their own toppings or dips. It’s a laid-back way to turn a humble ingredient into something that feels special, even if it’s just a quick fix after a busy day. And honestly, the smell of warm bread mingling with herbs and melting cheese just makes the whole house feel welcoming.
This recipe is a reminder that sometimes, the simplest things—like flatbread—can be the most versatile and fun to play with. No fuss, just good, honest flavors that come together in minutes. It’s my go-to for spontaneous get-togethers or when I want to treat myself without fussing over complicated recipes.
Focusing on the unexpected joy of transforming simple flatbread into bite-sized, customizable snacks that bring a cozy, communal feel to casual gatherings or weeknight snacks.
Transforming Flatbread into Snack-Size Joy
- I love how these bites turn a simple flatbread into a fun, customizable snack that everyone can enjoy.
- There’s something satisfying about assembling these — I feel like a kid playing with edible building blocks.
- The aroma of melted cheese and herbs always makes my kitchen feel warm and inviting, no matter the day.
- These bites remind me that you don’t need fancy ingredients to create something truly delicious and shareable.
- Whenever I make these, I feel a little proud of turning something humble into a crowd-pleaser.
The story behind this recipe
- This recipe came together one rainy afternoon when I was digging through my fridge, looking for something quick but satisfying. I had some leftover flatbread and a handful of toppings that needed using up, so I started experimenting. Turns out, turning flatbread into little bites is a game of simple pleasures—crispy edges, gooey cheese, fresh herbs—that just makes the day feel a little less hectic.
- It’s funny how small moments in the kitchen can spark ideas. I remember the first time I served these at a casual get-together and watching everyone grab a few, customizing as they went. The way the smell of toasted bread mingled with herbs and melted cheese always seems to bring a little warmth, even if it’s just a quick snack.
- heading
- story_type
Historical & Cultural Tidbits
- Mini flatbread bites originated as a way to turn leftover flatbread into a snackable, shareable appetizer, gaining popularity in casual tapas and party spreads.
- They echo the flavors of traditional Middle Eastern flatbreads but have been adapted globally into a versatile snack, blending different cultural toppings.
- This concept of bite-sized bread snacks dates back centuries, but the modern, customizable version surged with the rise of casual, communal eating trends.
- Chefs and home cooks alike love how these bites serve as a blank canvas—perfect for seasonal ingredients or whatever’s in the fridge.
Ingredient breakdown: key components
- All-purpose flour: I find this makes the flatbread tender yet sturdy enough for toppings; if you want a slightly chewier bite, try bread flour instead.
- Olive oil: Adds a subtle fruity aroma and helps the dough come together smoothly; for a richer flavor, use extra virgin, but light is fine if you’re avoiding strong tastes.
- Yeast: I prefer active dry yeast for a quick rise—if you’re in a rush, skip the proofing and mix directly into the flour; just make sure it’s fresh.
- Cheese: Melty mozzarella is my go-to, but sharp cheddar or crumbled feta work beautifully—look for ooziness and flavor that melts into every bite.
- Herbs & toppings: Fresh basil or thyme brighten the bites; dried herbs work if fresh isn’t available, but they won’t have quite the same vibrant scent.
- Sea salt & pepper: I always add a pinch of salt to the dough for flavor, and sprinkle a bit more on top before baking—crackling with seasoning is the best.
- Optional add-ins: Think caramelized onions or smoky paprika—these can elevate the flavor, but keep the toppings balanced so they don’t overpower the flatbread base.
Spotlight on key ingredients
Cheese:
- Olive oil: I love the fruity aroma that intensifies when heated, giving the flatbreads a lovely sheen and crispness; if you prefer a milder flavor, light olive oil works just as well.
- Melty mozzarella is my favorite for that gooey, stretchy texture, but sharp cheddar or feta add a different flavor punch—look for cheese that melts evenly and bubbles slightly.
Herbs & Toppings:
- All-purpose flour: I find this makes the dough tender yet sturdy enough for toppings; if you want a slightly chewier bite, try bread flour instead.
- Fresh basil or thyme brighten the bites; dried herbs work if fresh isn’t available, but they won’t have quite the same vibrant scent.
Notes for ingredient swaps
- Dairy-Free: Swap cheese for dairy-free cheese or hummus. It won’t melt quite the same, but still tasty.
- Gluten-Free: Use a gluten-free flatbread or make a quick cauliflower crust. Expect a different texture, more delicate and slightly crumbly.
- Vegan: Replace cheese with vegan cheese or a spread of mashed avocado for creaminess. Tastes fresher, less gooey.
- Herbs & Toppings: Fresh herbs like basil or thyme can be swapped with dried ones. Dried herbs are more concentrated, so use sparingly.
- Olive Oil: Use avocado oil or a neutral vegetable oil if you prefer a milder flavor. The aroma will shift slightly, but the oil still crisps beautifully.
- Salt & Pepper: Sea salt can be replaced with smoked salt for a smoky kick, or omit for a lighter taste. Pepper can be swapped with paprika for color and mild heat.
- Toppings: Instead of traditional herbs, try caramelized onions or thinly sliced zucchini for variety. They add moisture and flavor but can be softer after baking.
Equipment & Tools
- Rolling pin: To flatten the dough evenly.
- Baking sheet: To bake the flatbreads evenly.
- Pastry brush: To lightly oil the dough surface.
- Sharp knife: To cut the baked flatbread into bites.
- Mixing bowls: To prepare and knead the dough.
Step-by-step guide to flatbread bites
- Equipment & Tools: Gather a rolling pin (to flatten dough), a baking sheet (for baking), a pastry brush (for oil), and a sharp knife (to cut into bites).
- Preheat your oven to 220°C (430°F). Line the baking sheet with parchment paper for easy cleanup.
- In a large bowl, combine 2 cups of all-purpose flour, 1 teaspoon of salt, and 1 teaspoon of dry yeast. Mix well.
- Add 2 tablespoons of olive oil and gradually pour in about ¾ cup of warm water. Stir until a shaggy dough forms.
- Knead the dough on a floured surface for 5 minutes until smooth and elastic. Cover with a damp cloth; let rest for 10 minutes.
- Divide the dough into 12 equal pieces. Roll each into a small, thin circle, about 8-10 cm (3-4 inches) in diameter.
- Place the flattened dough onto the prepared baking sheet. Brush lightly with olive oil and sprinkle with a pinch of sea salt.
- Bake in the oven for 8-10 minutes, until edges are golden and slightly crisp. Keep an eye on them to prevent overbaking.
- Remove from oven, let cool slightly for 2 minutes. Top with cheese and herbs if desired, then return to oven for 2 more minutes.
- For toppings, scatter shredded mozzarella, chopped basil, or your favorite herbs. Drizzle a little olive oil for extra shine.
- Let the bites rest for 2 minutes on the tray to settle. Cut them into smaller bites with a sharp knife for serving.
- Plate the mini flatbread bites on a platter. Serve warm or at room temperature, perfect for sharing.
Let the baked bites rest for a couple of minutes to settle. Finish with extra herbs or a drizzle of olive oil if desired. Serve warm or at room temperature, arranged on a platter for sharing.
How to Know It’s Done
- Edges are golden and crispy, with a slight puff in the middle.
- Cheese is melted and bubbly, with herbs fragrant and fresh.
- Dough is cooked through, with no raw or doughy spots.
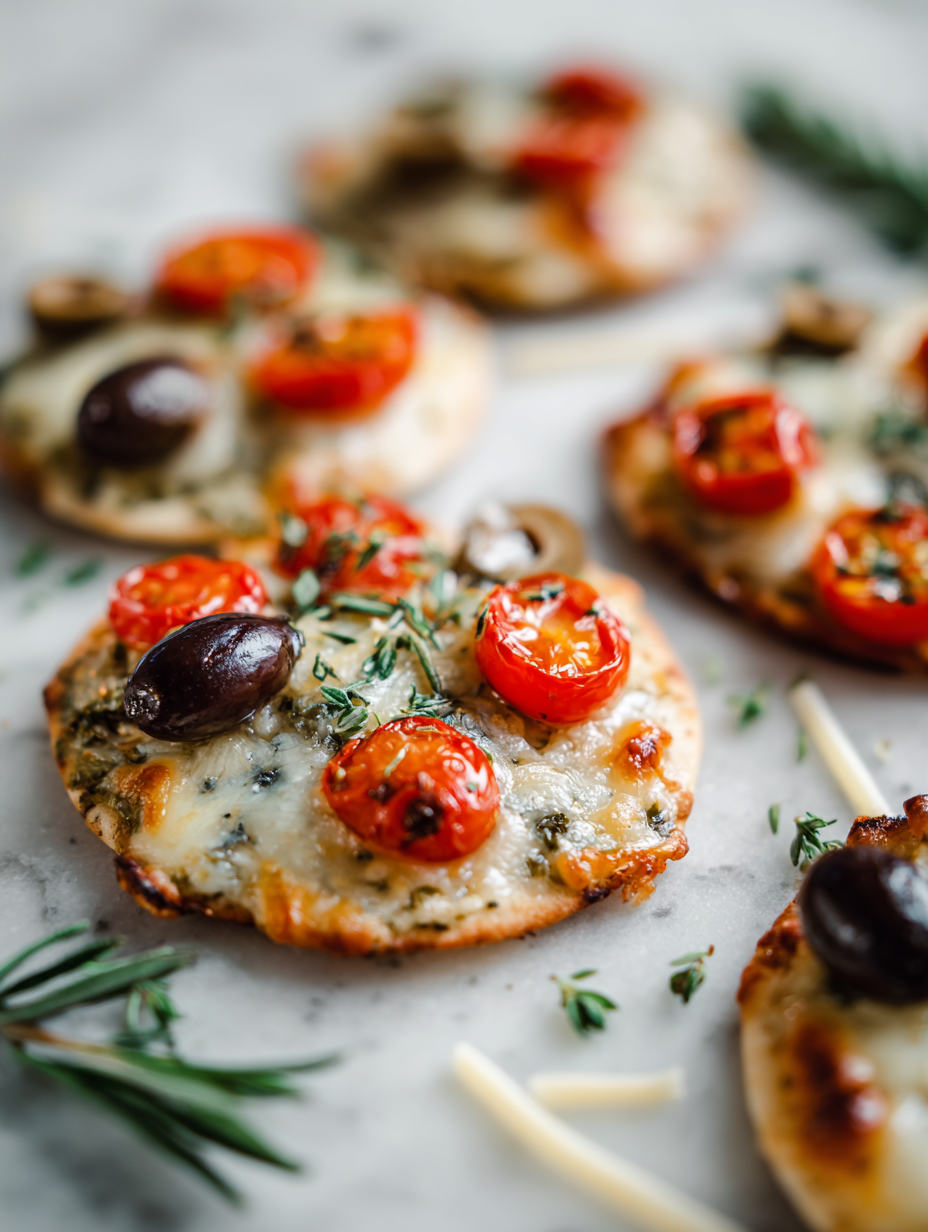
Mini Flatbread Bites
Ingredients
Equipment
Method
- In a large mixing bowl, combine the flour, salt, and dry yeast. Mix until evenly distributed.
- Pour in the olive oil and warm water, then stir to form a shaggy dough. It should come together easily but remain slightly sticky.
- Knead the dough on a floured surface for about 5 minutes until smooth and elastic. Cover with a damp towel and let rest for 10 minutes to relax the gluten.
- Divide the rested dough into 12 equal pieces. Roll each into a thin circle, about 8-10 cm in diameter, using a rolling pin on a floured surface.
- Place the flattened dough onto a parchment-lined baking sheet. Brush lightly with olive oil and sprinkle with a pinch of sea salt.
- Bake in a preheated oven at 220°C (430°F) for 8-10 minutes, until edges are golden brown and slightly crisp.
- Remove the flatbreads from the oven and sprinkle each with shredded cheese and chopped herbs while still warm.
- Return the baking sheet to the oven for another 2 minutes, just until the cheese melts and bubbles.
- Take out the flatbreads and let them rest for 2 minutes. Use a sharp knife to cut each into bite-sized pieces.
- Arrange the mini bites on a platter and serve warm or at room temperature for sharing.
Pro tips for perfect flatbread bites
- Use a hot oven (220°C/430°F) for quick, crisp bites. Preheat fully to avoid sogginess.
- Roll dough thin—about 3mm—for crispy edges and tender centers. Use a floured surface to prevent sticking.
- Brush with olive oil before baking—this gives a lovely sheen and helps toppings stick without burning.
- Keep an eye at 8 minutes—edges should be golden and bubbly, not burnt or pale. Adjust baking time as needed.
- For melty cheese, add toppings halfway through baking or sprinkle on top near the end to prevent over-drying.
- Rest baked bites for 2 minutes—allows cheese to set slightly, making them easier to handle and serve.
- Use a sharp knife to cut into neat bites—wait until slightly cooled for cleaner edges and less mess.
Common mistakes and how to fix them
- FORGOT to preheat the oven → Preheat early for even baking.
- DUMPED too much flour → Use just enough for a tender, not dry, dough.
- OVER-TORCHED flatbreads → Keep an eye and remove when edges are golden.
- SKIPPED resting dough → Rest to develop gluten and improve texture.
Quick fixes and pantry swaps
- When flatbread is soggy, splash with a few drops of water and quickly bake again for crispness.
- If cheese isn’t melting well, patch with a sprinkle of shredded cheese and broil for 30 seconds.
- DUMPED too much salt? Rinse toppings with a damp cloth before baking to mellow the flavor.
- When edges burn, shield with foil and lower oven temperature slightly for even browning.
- Splash a bit of olive oil on undercooked bites for a shimmer and extra crunch.
Prep, store, and reheat tips
- You can prep the dough a day ahead; just wrap it tightly and refrigerate to keep it fresh and pliable.
- Store baked flatbread bites in an airtight container in the fridge for up to 2 days—reheat in a warm oven until crispy and fragrant, about 5 minutes at 180°C (350°F).
- For longer storage, freeze the baked bites in a single layer, then transfer to a zip-top bag; reheat from frozen for best texture, adding a minute or two.
- Reheating will revive their crunch; watch for signs of sogginess—if they soften too much, a quick blast in the oven will restore crispness and aroma.
Top questions about mini flatbread bites
1. How do I get the cheese to melt perfectly?
Look for cheese that melts evenly and bubbles slightly when baked, like mozzarella or a mild cheddar. It’s all about that gooey, stretchy texture you want in each bite.
2. How do I know when the flatbreads are done?
Preheat your oven to 220°C (430°F) and bake for about 8-10 minutes. Edges should be golden and slightly crispy, with cheese bubbling and herbs fragrant.
3. When should I cut the bites?
Use a sharp knife to cut into small, neat bites once they’ve cooled slightly, about 2 minutes after coming out of the oven. This prevents tearing and keeps them tidy.
4. How should I store and reheat leftovers?
Store leftovers in an airtight container in the fridge for up to 2 days. Reheat in a warm oven at 180°C (350°F) for about 5 minutes until crispy again.
5. How can I make these bites crispier?
For a crispier bite, brush the flatbreads lightly with olive oil before baking. You can also sprinkle extra herbs or toppings on halfway through to prevent burning.
6. Which herbs work best for toppings?
Use fresh herbs like basil or thyme for vibrant flavor, and sprinkle on top just before baking to keep their aroma lively and fresh.
7. How can I make the flatbread thinner?
If your flatbread turns out too thick, gently roll it thinner with a rolling pin, aiming for about 3mm to ensure crisp edges and a tender center.
8. Can I make these dairy-free?
Omit the cheese for a dairy-free version, or swap with hummus or mashed avocado for creaminess. The flavor shifts, but still delicious.
9. What’s the best way to cut the flatbreads?
Use a pizza cutter or sharp knife to neatly slice the flatbreads into bite-sized pieces after they’ve cooled slightly, for an even, attractive presentation.
10. What if toppings don’t melt or stick?
If toppings aren’t sticking or melting properly, brush the dough with a little olive oil or bake for a minute longer to help everything set.
These mini flatbread bites are more than just a snack—they’re a way to bring a bit of imperfect joy to your table. There’s something about assembling them that feels honest, almost like a little kitchen ritual amid the chaos of daily life. I love how a simple flatbread can turn into something so customizable and satisfying.
Whenever I make these, I’m reminded that good food doesn’t need to be complicated. It’s about the little moments—smelling the herbs, feeling the crunch, sharing a plate—that make cooking feel real. No matter the occasion, they always seem to make everyone feel a little more at home.

Hi, I’m Claire Dawson, and I’m the voice behind The Procrastinators Cookbook. Food has always followed me around, even when I was busy putting other things off. Somewhere between long café shifts, half-finished to-do lists, and meals cooked later than planned, I realized that food was the one thing I always came back to.